
Rissoles are great. Smothered Rissoles are AWESOME!!! Especially when it’s mushroom gravy doing the smothering. 🙂
Mushroom Gravy Smothered Rissoles
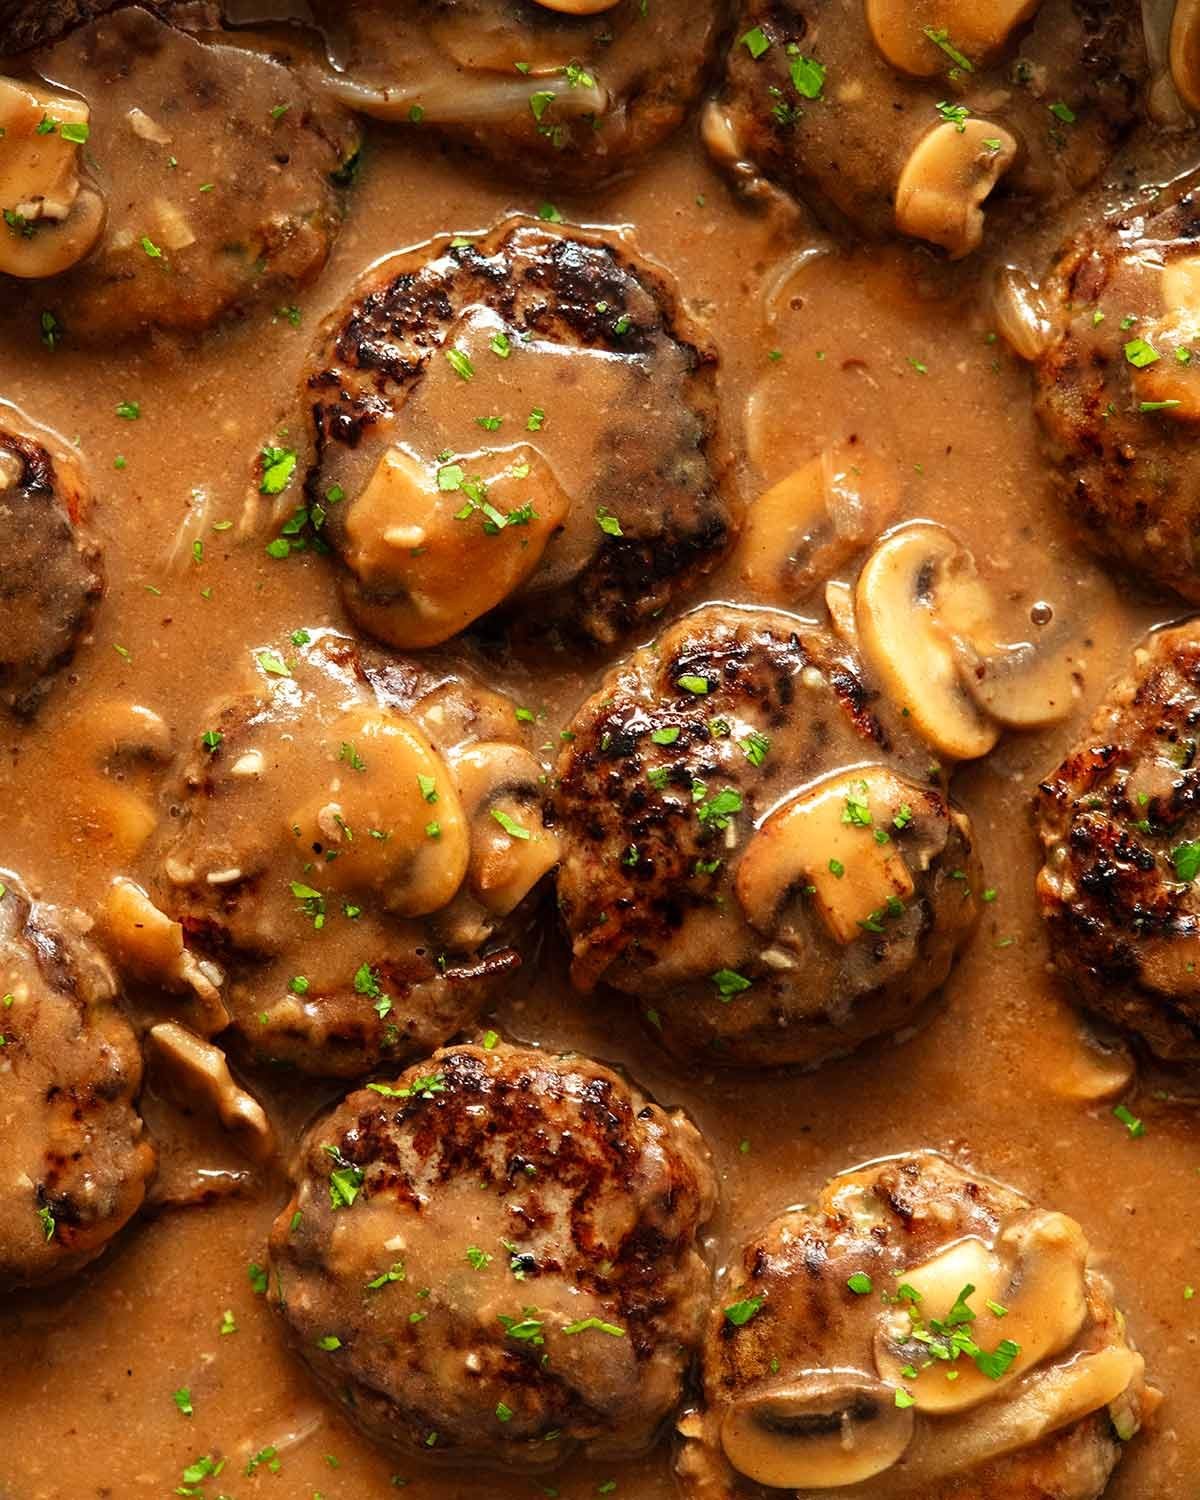
Anything smothered is a good thing, and today we are smothering rissoles in a mushroom gravy. Tomato sauce, step aside! I know you’re the classic choice for good ole’ Aussie rissoles, but I’m sorry, you can’t complete with a luscious mushroom gravy.
And if that weren’t enough, today’s rissoles will be the softest, juiciest ones you’ve ever had in your life because they’re cooked by simmering them in the gravy. Gently braising makes them way more tender than pan frying, plus there’s the extra benefit of the flavour exchange that takes place: the gravy gets flavoured by the rissole juices and the rissoles absorb the tasty gravy flavour.
It’s just downright tasty, homemade comfort food that everybody loves!

In case you’re wondering what rissoles are, they’re a nostalgic Aussie family favourite. Seasoned beef patties usually made with beef (though I adore chicken ones too) bound with breadcrumbs and egg then pan seared and typically served with Aussie tomato sauce (our version of ketchup).Here’s my recipe for classic rissoles. They will always have a place in my heart (and stomach!), but sometimes it’s nice to change things up!
For American readers out there, they’re like Salisbury Steak, but smaller, plus we hide veg in them.


And here’s a nice close up of the inside of the rissoles – can you tell how soft and tender they are inside??

Ingredients in Smothered Rissoles
Here’s what you need to make these Smothered Rissoles.
FOR THE PLUMP, JUICY RISSOLES
Grated vegetables and panko keeps these extra soft and moist inside, and onion, garlic and a little Worcestershire sauce makes them extra tasty!

Beef mince (ground beef) – Beef is classic though I’ve made rissoles with lamb before and it is so good! You can get lean if you want but fat is where the beefy flavour is. Just saying. 🙂 (PS If you want chicken rissoles, use this recipe – chicken needs a little extra flavour boost).
Onion – Grated, so it’s fine enough so we don’t have to sauté it separately beforehand (like we’d have to for diced onion). I know grating onion might seem like a weird concept but it’s so worth it for the extra tastiness you get in the rissoles – and we’ve got the box grater out anyway for the carrot and zucchini!
Carrot and zucchini – Hidden vegetables of choice. And also, they keep the inside of the rissoles moist.
Garlic – Where there is onion, there is garlic! Crush it using a garlic press or finely grate it.
Panko breadcrumbs – These make rissoles softer and fluffier than using regular breadcrumbs because the pieces are larger. Find them in the Asian aisle of regular grocery stores though cheaper at Asian stores.
Dried herbs – thyme and oregano. Though, not the end of the world if you don’t use them.
Worcestershire sauce – Savoury flavour. Just 2 teaspoons. Anymore and it tastes too Worcestershire-ish (that’s a thing)!
Egg – Keeps the rissoles together so they don’t fall apart when cooking.
MUSHROOM GRAVY
And here’s what you need for the gravy:

Unsalted butter – Makes a tastier gravy than using oil.
Garlic and onion – For flavour, and I also love the texture the slippery onion slices add to the sauce.
Mushrooms – I use regular button mushrooms but any sliceable mushrooms will work fine here.
Beef not chicken stock/broth – For gravy that’s a deep rich brown colour instead of an unimpressive pale brown colour. Also makes the gravy flavour more savoury than using chicken stock. I always use low sodium stock so I can control the amount of salt used.
Worcestershire sauce – For a touch of savoury flavour.
Flour – To thicken the sauce into a lovely gravy consistency that clings to the rissoles!
How to make Smothered Rissoles
The key here is to brown the rissoles without cooking them through as we will finish cooking them in the gravy as it thickens. That way, they are at optimum juicy, tender perfection!

Grate the onion using a box grater so the pieces are fine enough to cook through with the rissoles – avoid big chunks, make the onion as fine as you can. Grating is the trick! It avoids the need to pre-cook like you would with chopped onion.
Mix in the remaining rissole ingredients. I use my hands to mix it well.

Form 12 patties (1/4 cup each), and press an indent into one side. This stops the rissoles from doming as they cook (I know you wouldn’t flatten them with a spatula and squeeze all the juice out!).
Lightly sear the rissoles for 1 1/2 minutes on each side to brown them on the outside but avoid cooking them all the way through, as we will finish cooking them in the gravy for the softest, tastiest rissoles of your life! Cook in 2 batches and remove onto a plate.
PS Use a pan large enough to fit all 12 rissoles in snugly. I use a 30cm/12″ non-stick pan.

Cook mushrooms – Give the pan a quick wipe with a paper towel to remove most of the black stuff (no need to be meticulous here). Then melt the butter, start with the onion then add the mushrooms and cook until softened (about 3 to 4 minutes). Add garlic for the last 30 seconds (if you add them too soon, they will burn).
Cook off flour – Scatter the flour across the pan (don’t dump in one place) and stir for 1 minute to cook out the flouriness. It will seem a little dry rather than pasty, that’s ok, it will dissolve into the liquid fine.

Lump-free gravy – While stirring, slowly pour in half the beef stock then keep stirring until the floury mixture mixes into the stock and thickens it. Then pour in the rest of the stock, Worcestershire, salt and pepper and mix.
Mixing as you pour, and pouring the stock in two parts are my little tricks for lump-free gravy!
Simmer rissoles – Once the sauce comes up to a simmer, gently place the rissoles in a cook for 5 minutes until the sauce thickens into a thin gravy and the rissoles finish cooking through. Stir gently to make sure the base doesn’t catch.
Goal thickness – Aim for the gravy to be thinner than you like, because it will thicken quickly as it cools which will happen as you serve it, get the plate to the table and yell for everyone to hurry up, get to the table, it’s time to eat!

Serve over a starchy vehicle of choice – mashed potato, plain rice or upgrade to Garlic Butter Rice If you’re doing the low carb thing, Cauliflower Mash is actually very nice (I know, you’re dubious, I was dubious too but I’ve been converted).
As for greens, it’s pictured with steamed broccolini tossed in a French dressing, not because I was trying to add a bit of European flair to this good ole’ Aussie fair but because it’s the dressing of the week. Here are the eight I rotate between as my standby dressings, they all last two to three weeks so they’re handy to have in the fridge, ready to grab when needed.
Use for leafy greens, any raw chopped salads and also for cooked vegetables – makes any boring steamed green so much more interesting! – Nagi x
Watch how to make it
Hungry for more? Subscribe to my newsletter and follow along on Facebook, Pinterest and Instagram for all of the latest updates.

Smothered rissoles
Prep: 20 minutes
Cook: 15 minutes
Total: 35 minutes
Main
Aussie, Australian
Servings4
Tap or hover to scale
Cook ModePrevent screen from sleeping
Instructions
ABBREVIATED RECIPE:
Mix rissole ingredients, form 12 patties, slightly indent one side. Cook in 2 batches until lightly browned but raw inside. Wipe pan clean, melt butter, cook onion, then mushrooms, add garlic towards end. Make roux then gravy. Cook rissoles in gravy as it thickens, 4 – 5 minutes, serve!
Rissoles:
Grate the onion into a large bowl, add panko, toss to soak in the onion juices. Add remaining rissole ingredients and mix well with your hands.
Dented patties – Form 12 patties (1/4 cup each) and make a slight indentation on one side (this prevents doming while cooking).
Lightly brown – Heat 1 tablespoon of the oil in a large non-stick pan (30cm/12″) over medium high heat. Cook half the rissoles for 1 1/2 minutes on each side until lightly browned but still raw inside. Remove onto a plate. Add the remaining oil and repeat with remaining rissoles.
Mushroom gravy:
Clean pan – Discard excess oil and give the pan a rough clean with paper towels, just to remove most of the black bits.
Cook mushrooms – Melt the butter in the same pan, cook the onion for 1 minute, then add the mushrooms and cook for 3 – 4 minutes until they release water, soften, then become lightly browned. Add the garlic for the last 30 seconds.
Cook off flour – Turn the heat down to medium, scatter flour across the surface and stir for 1 minute – it will be like a dry paste.
Half beef stock – While stirring, pour in half the stock then keep mixing until the flour paste dissolves and thickens the liquid, and is lump free (about 30 seconds).
Simmer rissoles and thicken gravy – Add remaining stock, Worcestershire sauce, salt and pepper. Stir, turn heat up slightly to medium high. When it starts simmering, gently place the rissoles in (including any juices pooled on the plate). Cook rissoles 4 – 5 minutes until the liquid thickens into a thin gravy (aim for thinner than you want, thickens as you serve).
Recipe Notes:
2. Panko breadrumbs are larger than regular breadcrumbs so they make rissoles softer. Find them in the Asian aisle at regular grocery stores though they’re cheaper at Asian stores!
Leftovers keep for 4 days in the fridge. I just warm in microwave. To freeze, fully cool uncovered then freeze for up to 3 months. Uncooked – Freeze uncooked patties or refrigerate overnight. You can also make a full batch of gravy but cook only, say, half the rissoles and freeze the other half uncooked. Cool, freeze gravy, then used for the frozen rissoles.
Nutrition per serving for rissoles and gravy. Excludes mashed potato.
Nutrition Information:
Calories: 456cal (23%)Carbohydrates: 19g (6%)Protein: 33g (66%)Fat: 28g (43%)Saturated Fat: 10g (63%)Polyunsaturated Fat: 2gMonounsaturated Fat: 13gTrans Fat: 1gCholesterol: 138mg (46%)Sodium: 1032mg (45%)Potassium: 1105mg (32%)Fiber: 3g (13%)Sugar: 5g (6%)Vitamin A: 2907IU (58%)Vitamin C: 14mg (17%)Calcium: 74mg (7%)Iron: 5mg (28%)
More rissoles (and rissole-type things)
Life of Dozer
Got right into recipe filming the day after we moved in! Here we are filming an Instagram reel for Friday’s Peanut Butter Stuffed Brownies. If you’re wondering what on earth I’m doing making food in the hallway when there’s such a fabulous kitchen here – I’m chasing the light. 🙂

Yes, I’m in ugg boots and trackies and I’m thankful I’m far away enough that you can’t see I’m makeup-less and as for the hair, I didn’t find my brush until Monday!!!