
Your complete resource for How to Make Beans: a tried-and-true recipe, bean cooking times, recipe pro-tips, and optional variations. Once you’ve made tender and creamy homemade beans, it will be hard to go back to canned! They’re flavorful, nutritious, easy in a few simple steps, and the perfect addition to so many meals.
As a plant-based eater of over 15 years, you can say that beans are kind of a big deal! They’re flavorful, filling, nutritious, affordable, and rich in plant-based protein, so—naturally— they work their way into many of my meals.
Though canned beans aren’t necessarily expensive, you can purchase their dried counterparts for pennies on the dollar, and they taste so much more creamy and flavorful when simmered with veggie stock and aromatics.
I’m all about demystifying plant-based eating and making it more affordable, so today I’m sharing my tried and true dried bean recipe (and all my no-fail tips and tricks) so you too can enjoy perfectly tender, homemade beans in your meals, too!
If you’re intimidated by the thought of cooking beans from scratch, rest assured! It’s an easy, mostly hands-off process. If you can soak, drain, and simmer, you too can make these nutritious and delicious legumes. Even beginner cooks can master this recipe on the first try; the stovetop does all the heavy lifting for you.
Why Use Dried Beans Instead of Canned?
Dried beans not only taste better and are easier on digestion, but they’re incredibly budget-friendly and just as versatile. I make these beans almost weekly, throwing them into everything from soups and chilis to bowls and salads. In fact, now that I have this method down, I only purchase canned beans for last-minute needs.
Furthermore, soaking the beans and simmering them with aromatics makes them tender, flavorful, soft, and creamy—world’s better than anything you can find in a can!
Each 14-oz can of beans is equivalent to about 1 1/2 cups of home cooked beans.
Ingredients
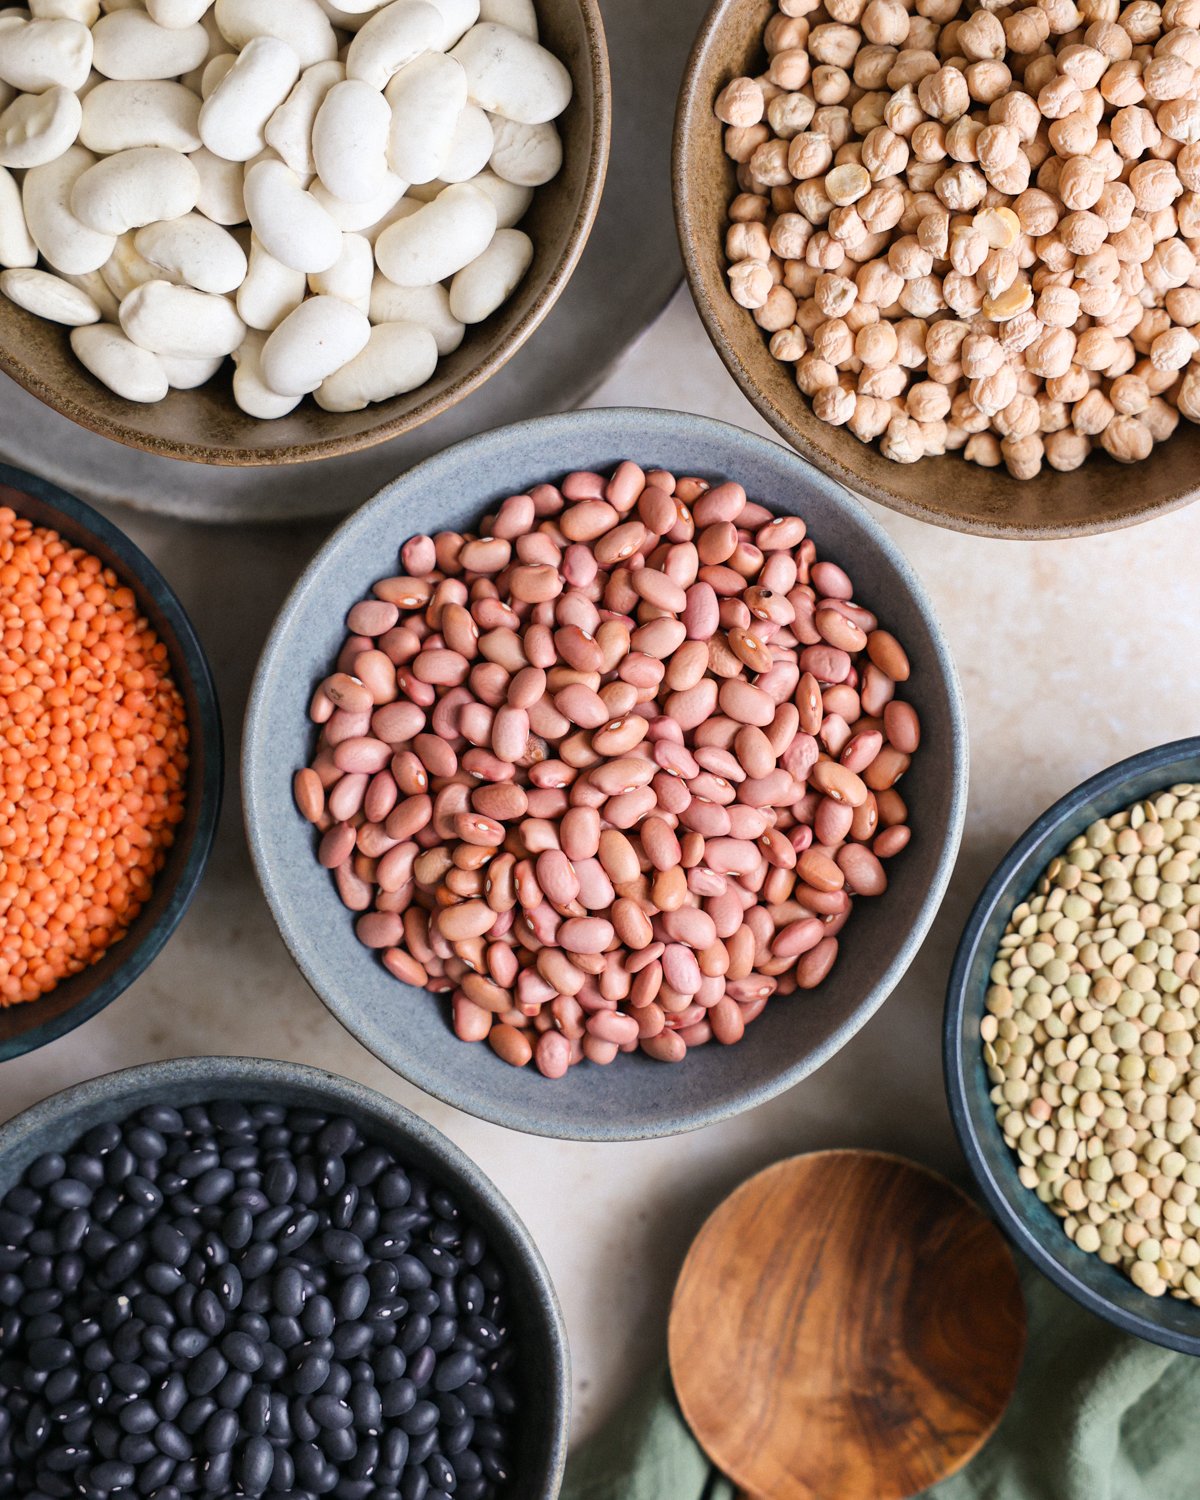
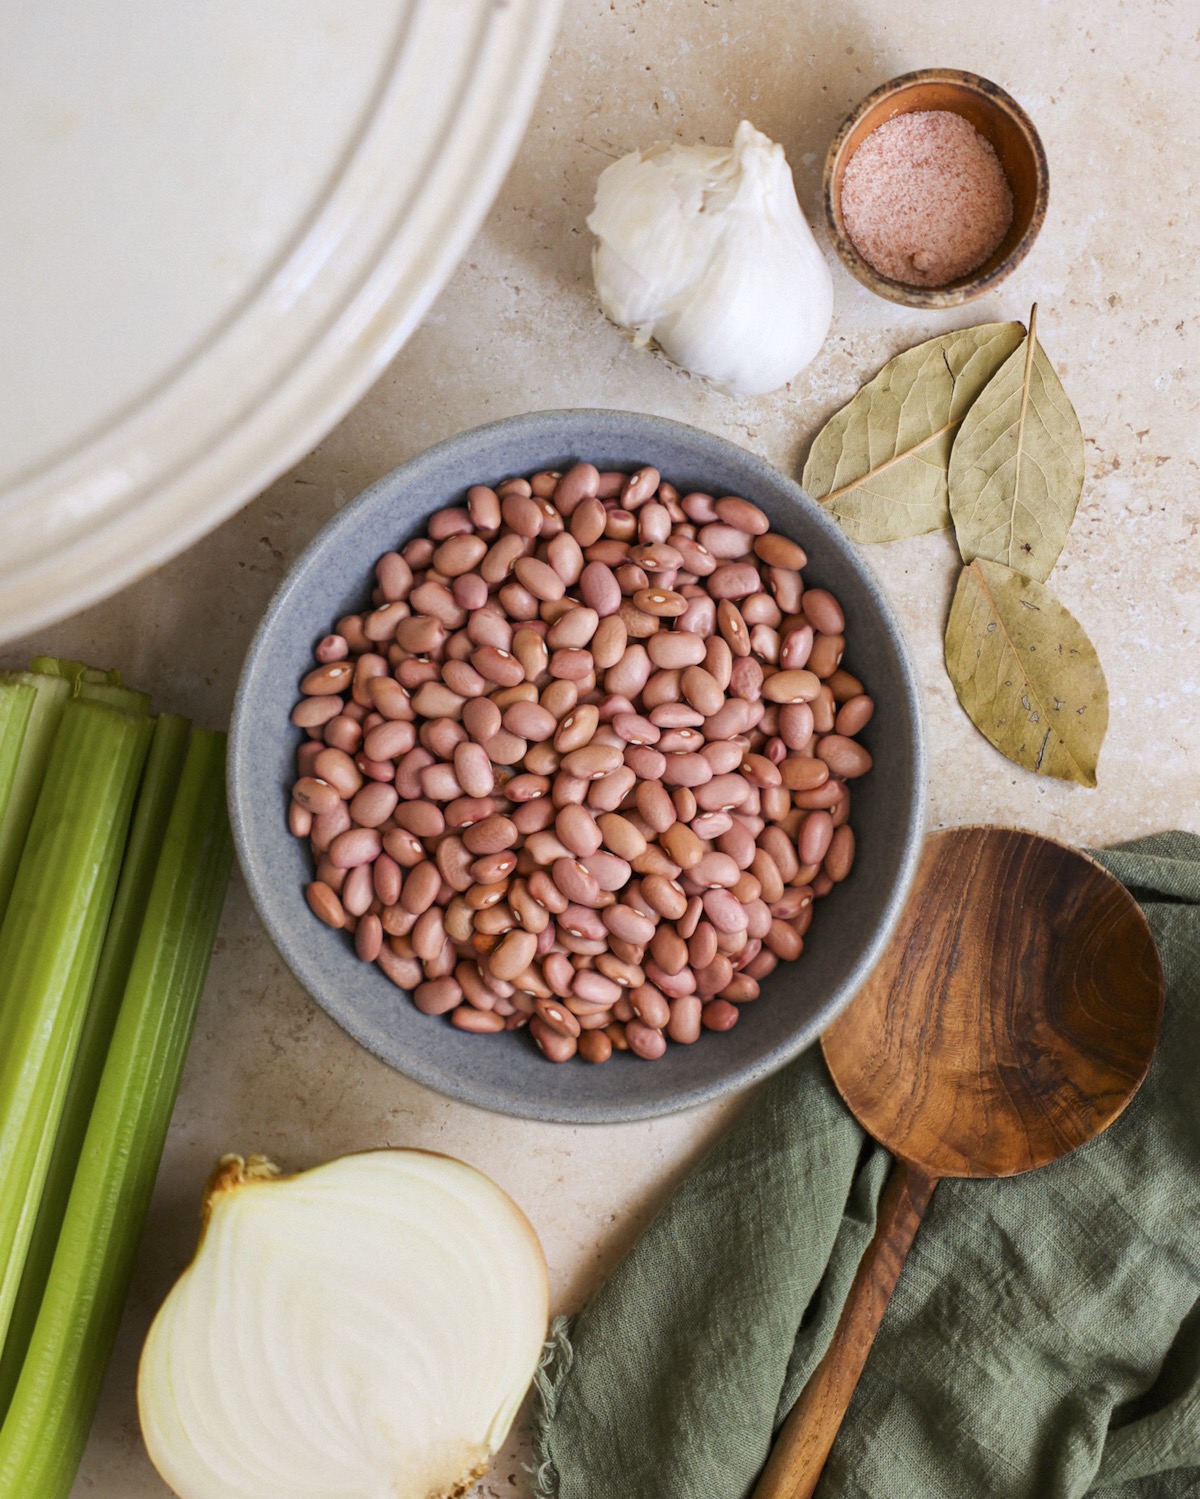
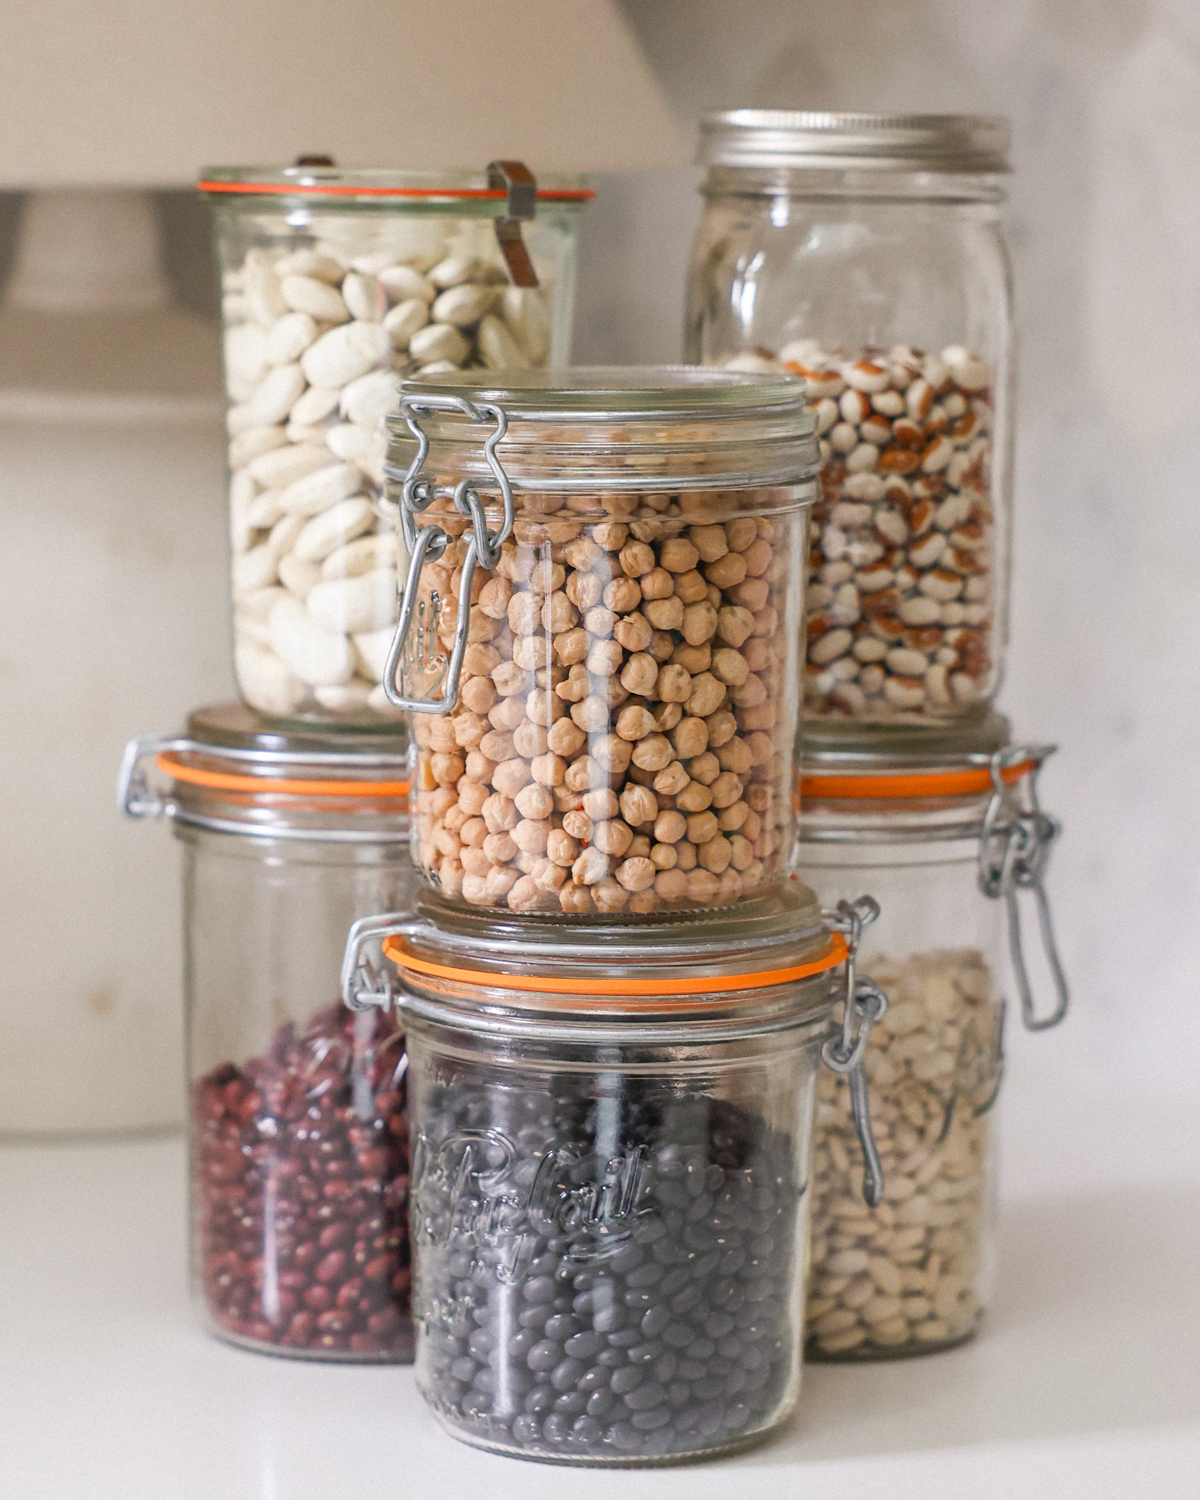
Dried Beans: Choose any type of dried beans—black, kidney, black-eyed peas, pinto, navy, and more! I’m using Heirloom pink beans, similar to pinto beans, in these photos.
Vegetable Stock or Water: Give food scraps a second life by using them to make homemade stock or use store-bought broth for convenience. For more savory umami flavor, use mushroom stock. Or you can use water, especially if you want your beans to be a blank canvas.
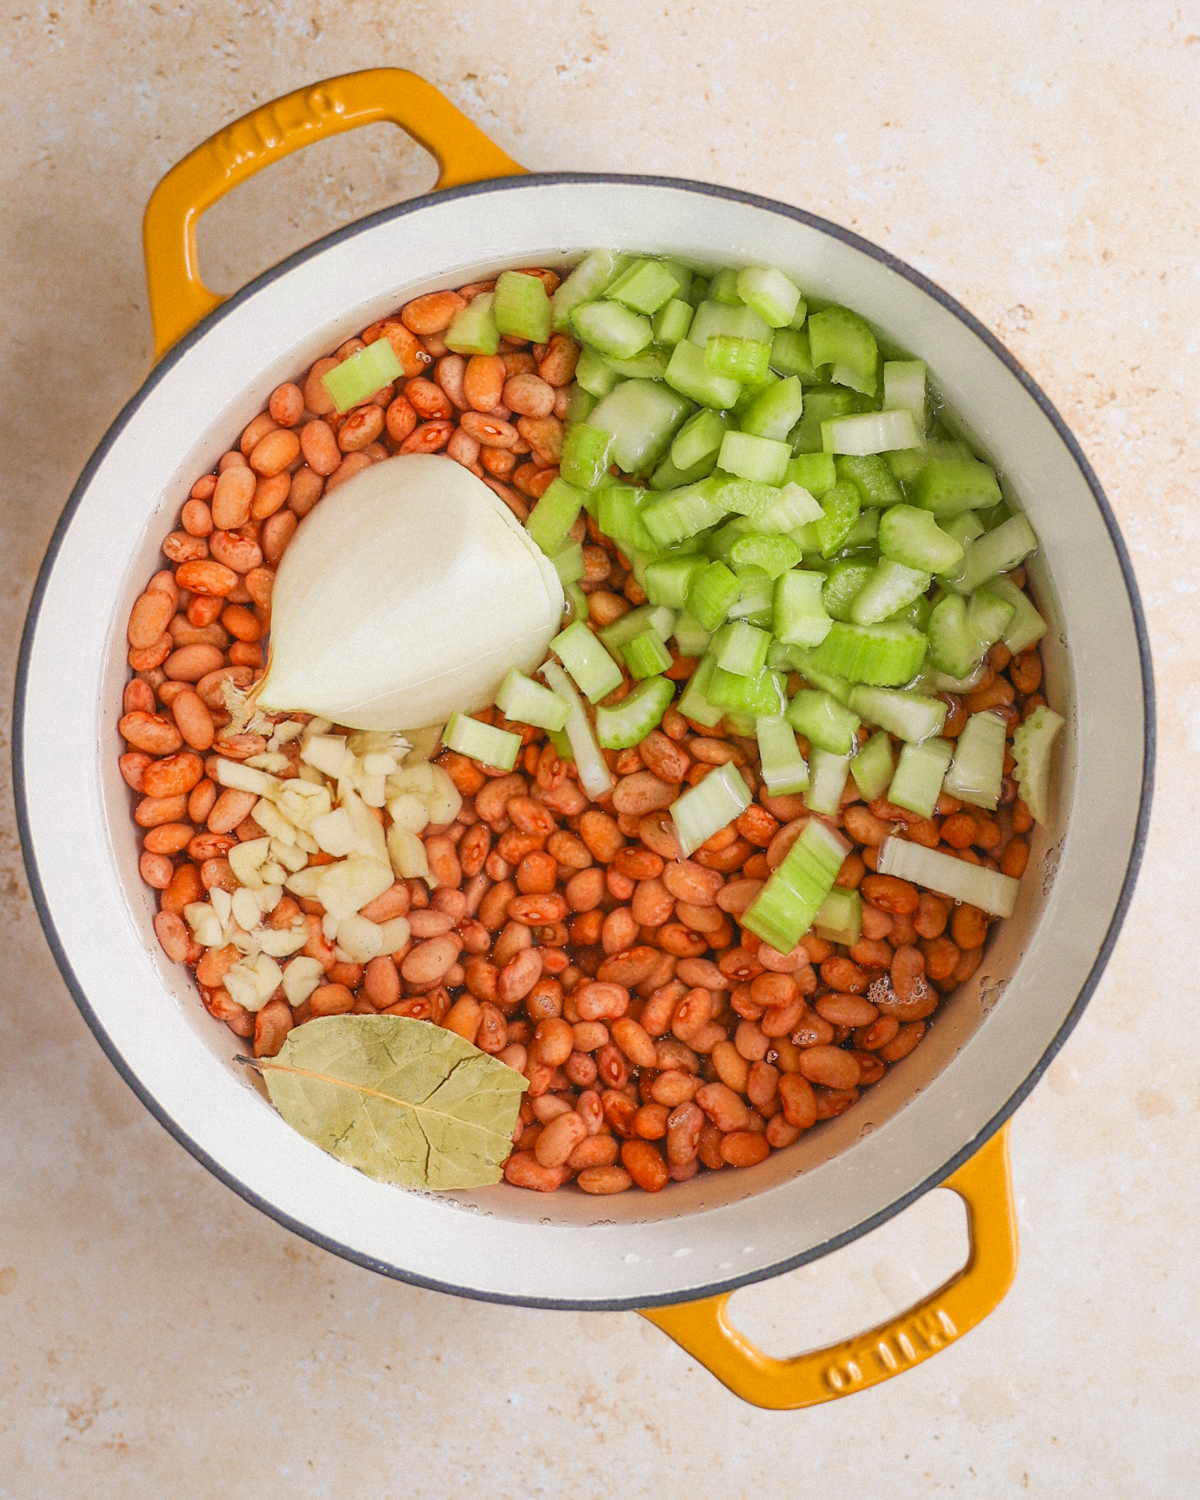
Aromatics: Chopped onion, minced garlic, and diced celery are optional, but add pungent, nutty, and dimensional notes.
Seasonings: A dried bay leaf adds a light herbal aroma and contains enzymes to break down the beans, making them easier to digest. Salt enhances all the flavors!
How to Cook Dry Beans
These super tasty homemade beans are ready in just 5 easy steps:
Prepare. Sort the beans, removing debris or irregular pieces.
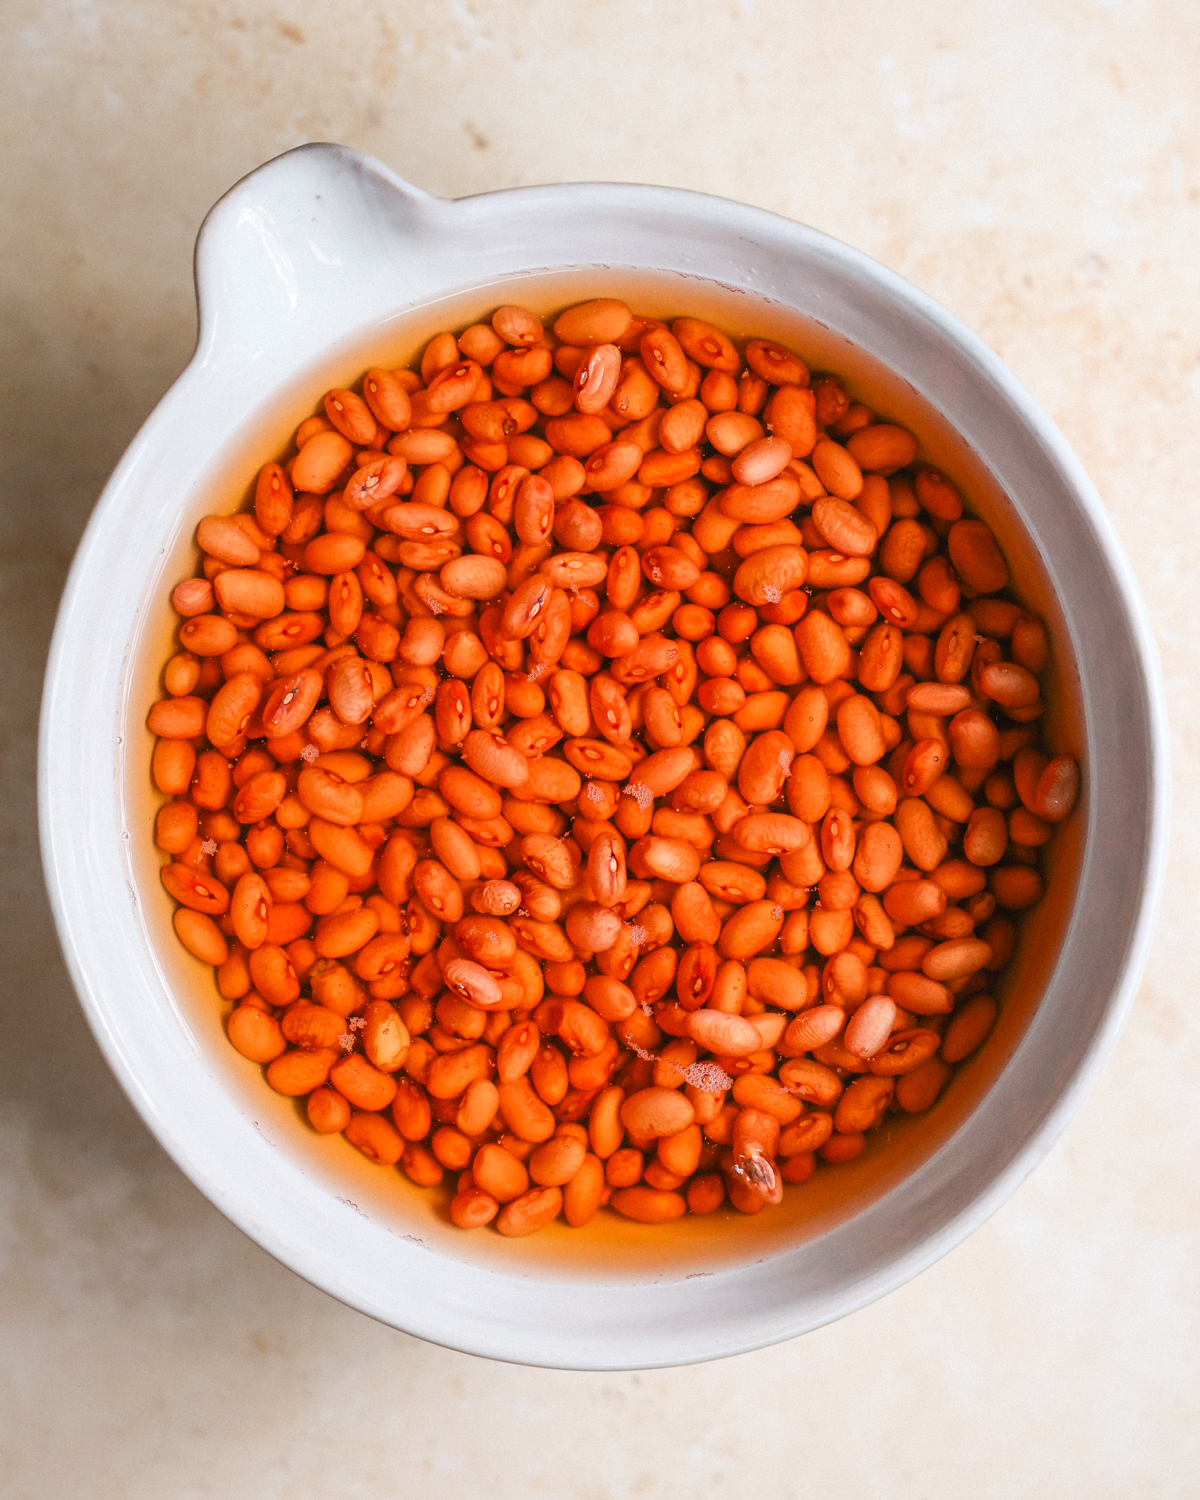
Soak. Add the dry beans to a large bowl or pot. Cover them with at least an inch of cool water. Cover and let the beans soak for 8 hours or overnight.

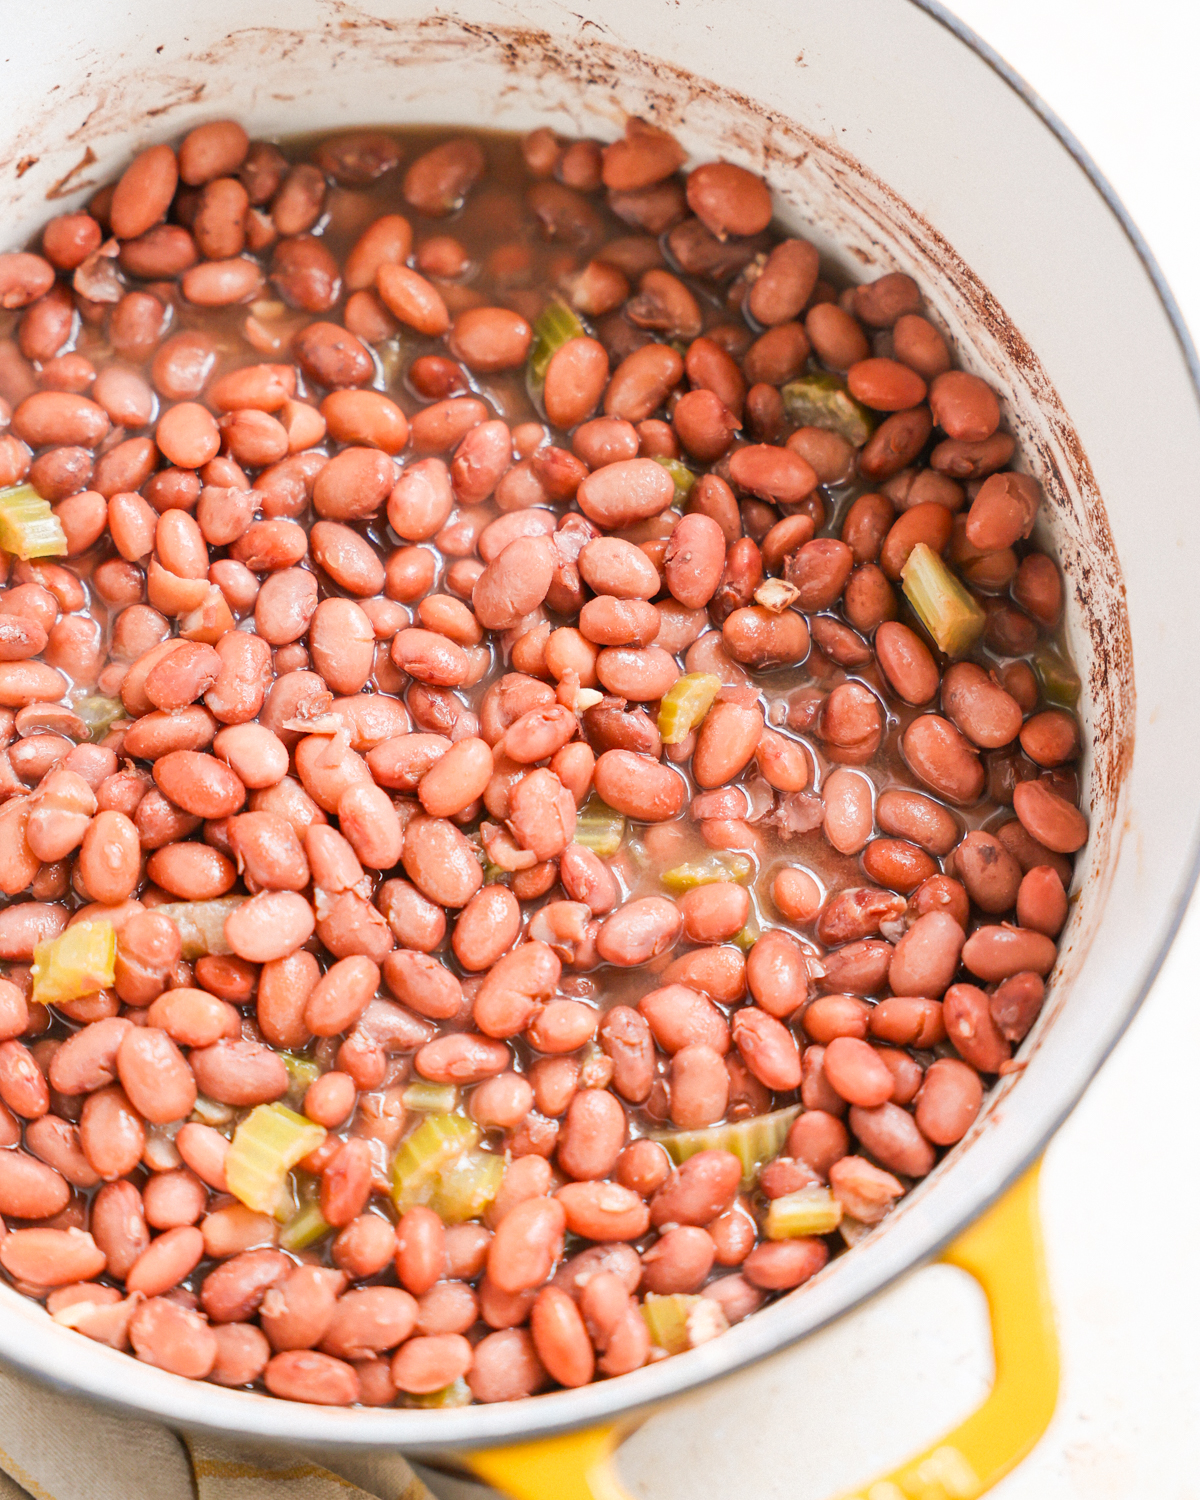
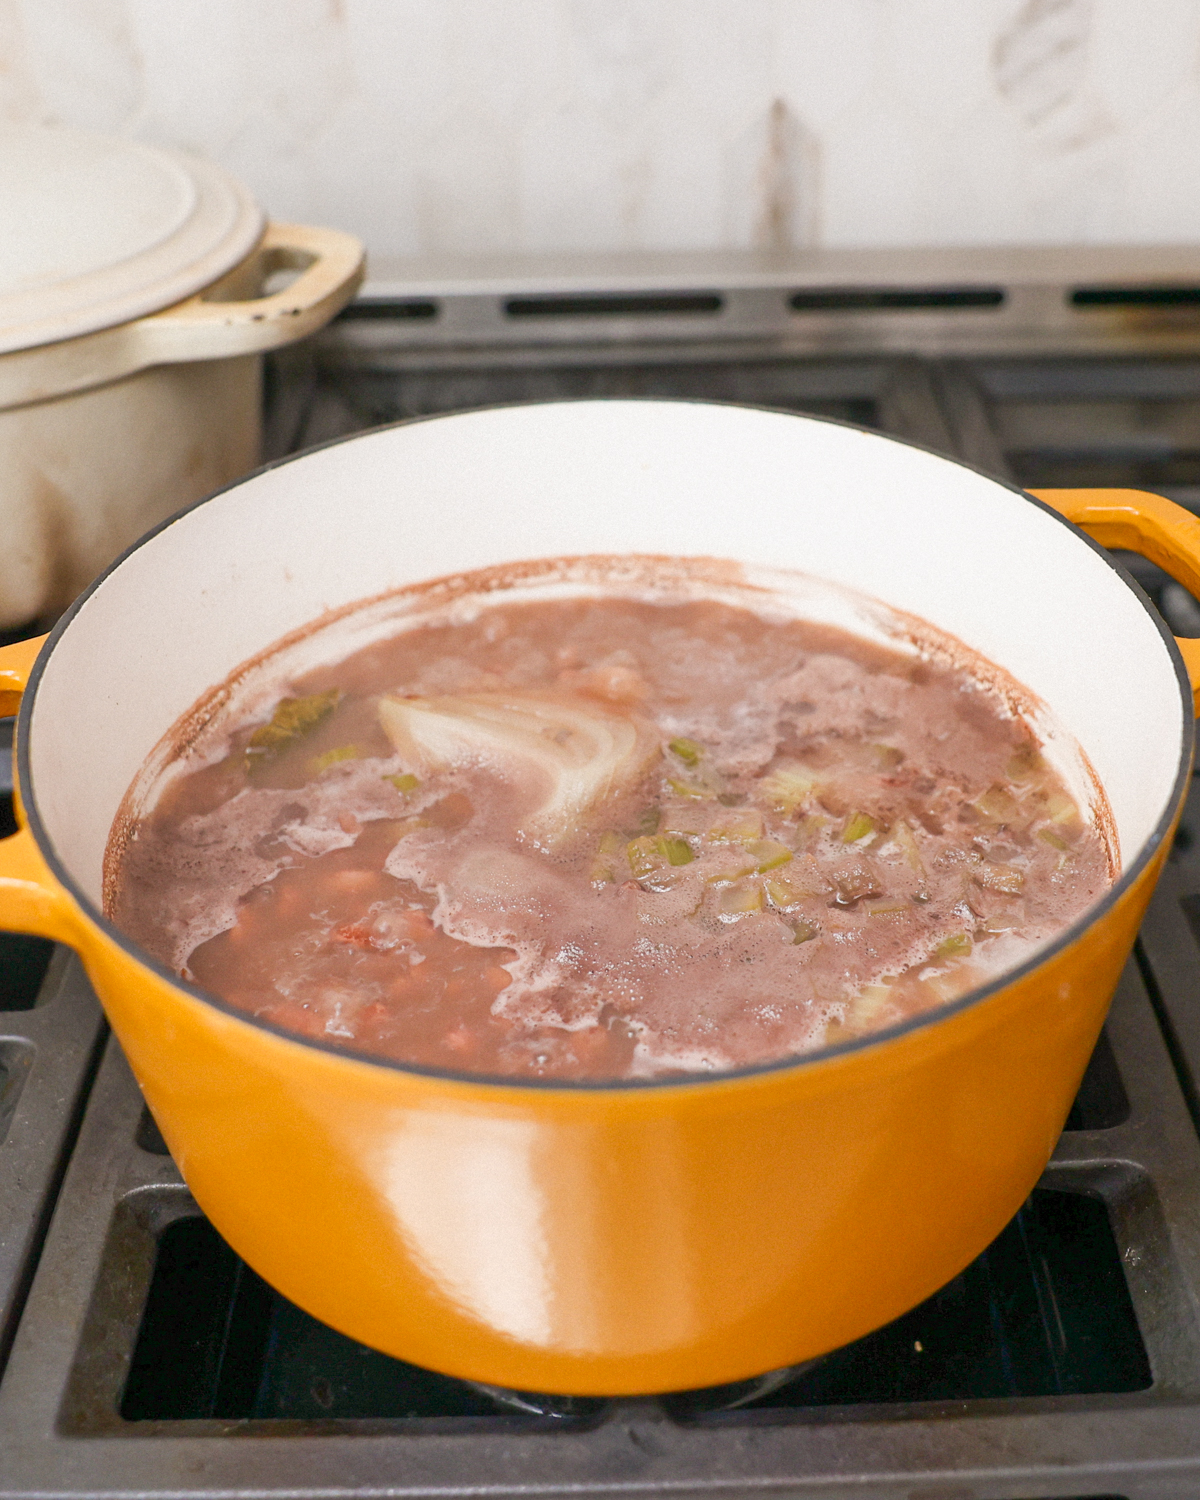
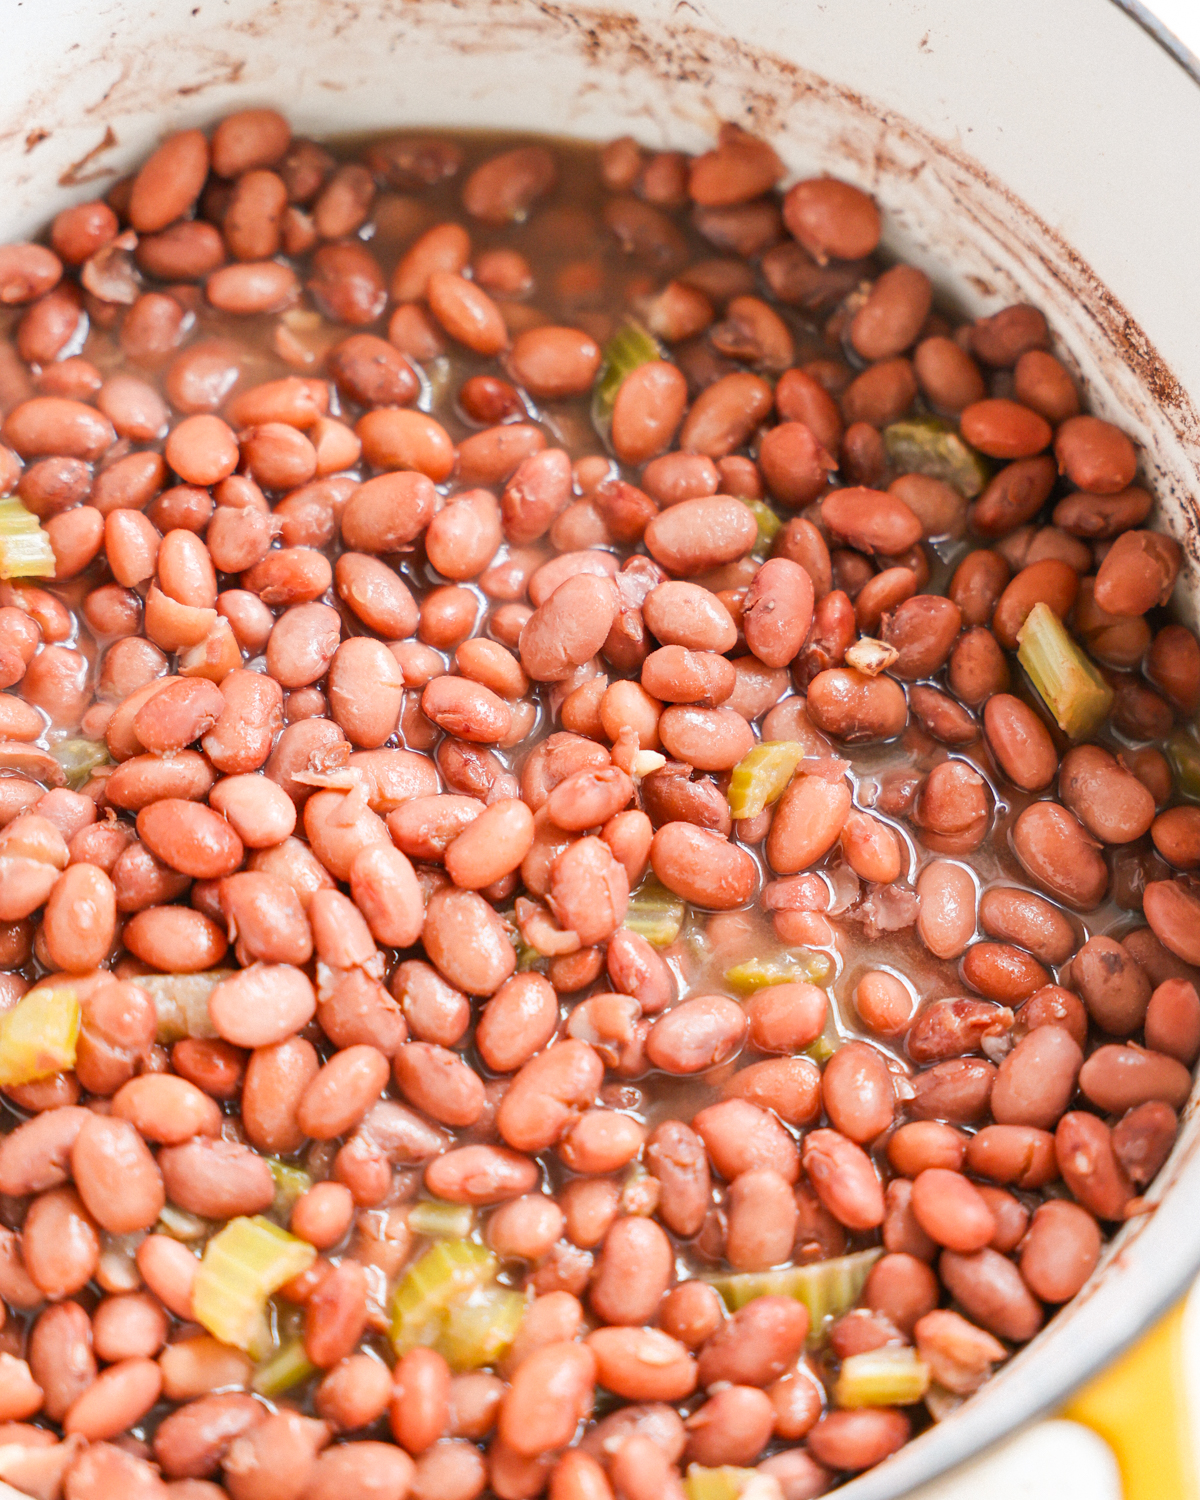
Boil. Drain and rinse the soaked beans in a colander, then transfer them to a Dutch oven and cover with the water or stock/broth. Add the bay leaves, onion, garlic, and celery (if using). Cover the pot with a lid and bring it to a boil. Skim off any white foam that floats on top of the water.
Simmer. Reduce the heat to medium-low simmer the beans with the lid ajar until they are tender, about 60 minutes for most beans. This may take up to 90 minutes for some beans, like kidney beans. Check their doneness at the 45- and 60-minute marks and add on simmering time as needed. Add more liquid if needed.

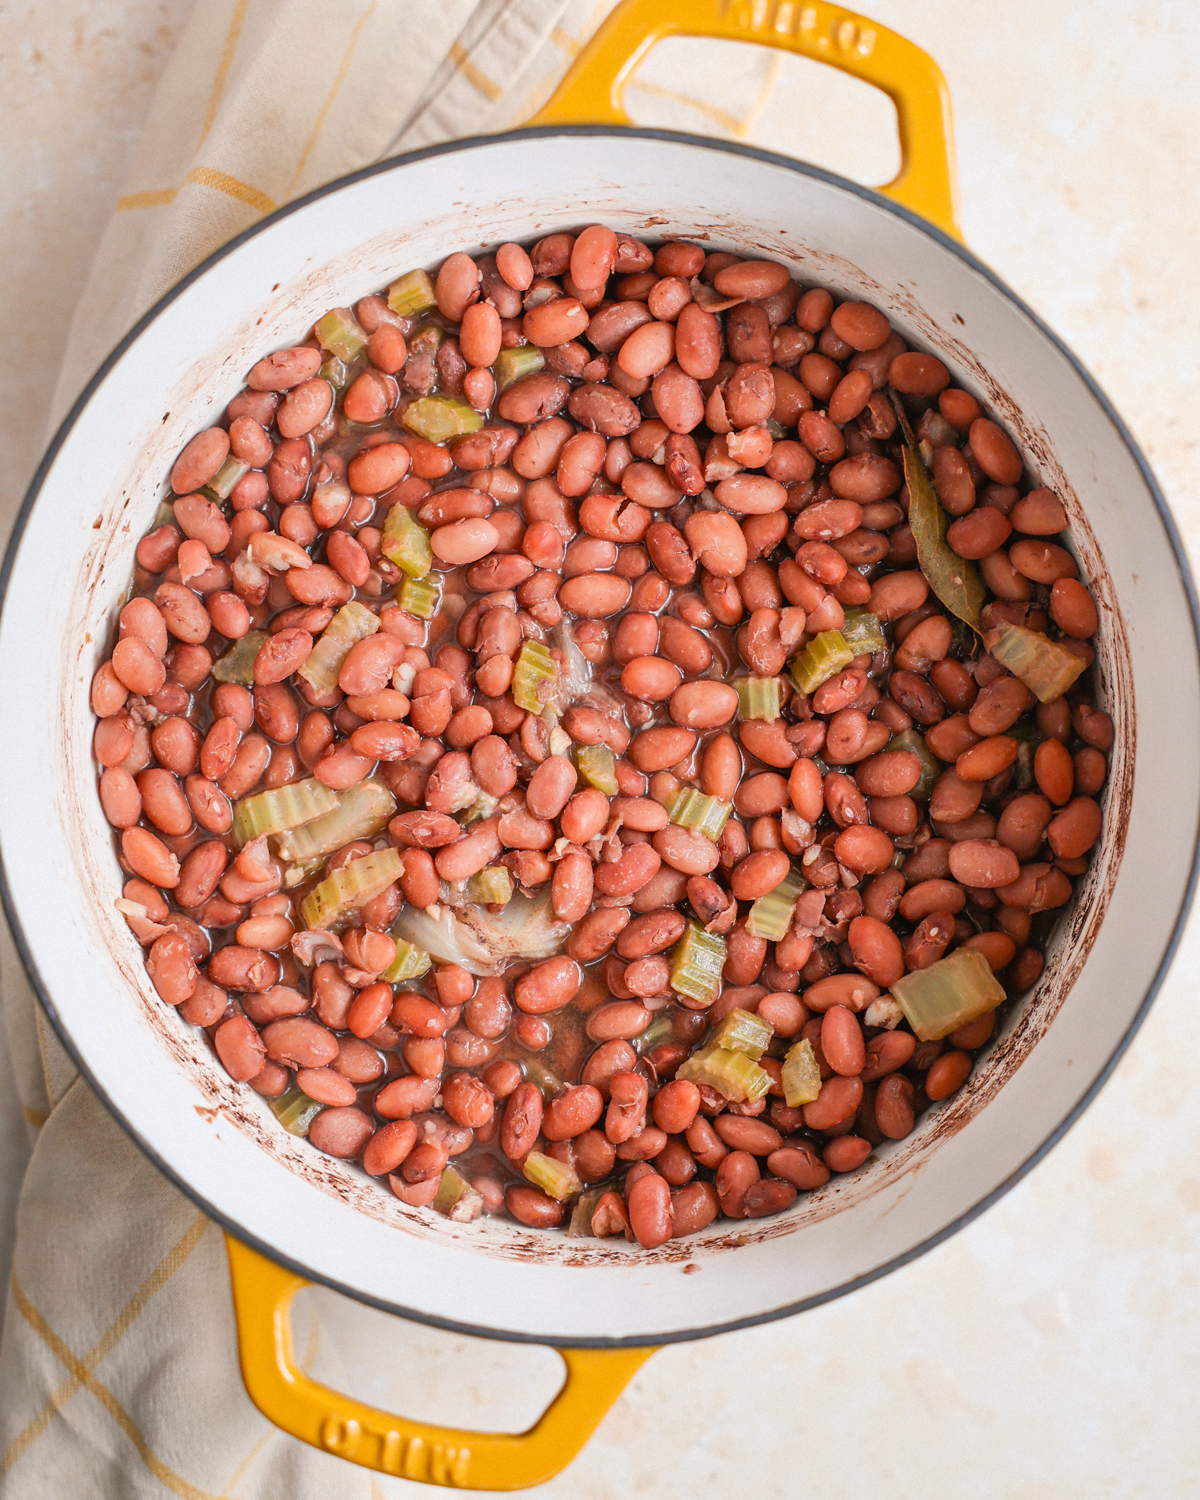
Finish. Season the beans with salt in the last 5 minutes of cooking time. If you’d like creamier beans, add a couple of tablespoons of oil, or use a spoon to mash some beans on the side of the pot.
Bean Cooking Times
Wondering “how long do beans take to cook?” I’ve done the hard work for you—testing cooking times for each bean variety so you don’t have to!
Bean
Soak Time
Cook Time
Red Beans/Kidney Beans
8 hours
60-90 minutes
Black-Eyed Peas
Not necessary, but I soak them for 8 hours anyway
60-90 minutes
Butter Beans/Large Lima Beans
8 hours
45-60 minutes
Baby Lima Beans
8 hours
60 minutes
Lentils (Green, Black, Brown)
Not necessary
30-45 minutes
Cannellini Beans
8 hours
60-90 minutes
Navy Beans
8 hours
60-90 minutes
Pinto Beans
8 hours
60-90 minutes
Black Beans
8 hours
60-90 minutes
Chickpeas/Garbanzo Beans
8 hours
60-90 minutes
Jenné’s Recipe Tips
Don’t skip the sort and rinse! Even the package of high quality beans can occasionally contain small pieces of debris (think: pebbles, dirt, or insects) or misshapen, discolored, or shriveled beans. Remove them before rinsing the beans thoroughly in a colander to remove any dust or dirt.
Skip the foam off the top. This sudsy, off-white layer contains starches, proteins, and the compounds (oligosaccharides) which can cause gas and digestive issues. Removing it improves the beans’ flavor and makes them easier to digest.
Add more broth or water. Depending on how long your beans cook and how much broth you want, you may need to add more liquid as they cook. Add water or broth 1 cup at a time.
Test for doneness. Many factors—such as their freshness, water mineral content, altitude, and more— affect how quick or slowly the beans cook. Check them at the 45 and 60 minute marks and add on additional simmering time as needed.
Add additional time for altitude. If cooking at 3,500 feet or higher, you may need to add 15-30 minutes of simmering time, as the lower atmospheric pressure necessitates longer a longer simmering time (source).
Mind water hardness. Beans will need to simmer longer in hard water, as it contains extra minerals that can make it more difficult for the water to penetrate the bean skins.
Make them creamy. For a silkier texture, add up to two tablespoons of grapeseed oil or another oil (such as olive or avocado oil), or smash some of the beans with a spoon during the final few minutes of cooking.
Keep it simple. If you want super simple plain beans, cook them with water instead of broth, and skip the aromatics and spices.
Express Soaking Options
When it comes to how to soak beans, the most reliable method is to soak them in cool water overnight.
If you’re short on time or cooking last minute, I recommend a hot soak instead: bring the beans and water to a boil, simmer for 2–3 minutes, then remove from heat and let them soak for 2-3 hours. Alternatively, pour at least 1 inch of boiling hot water over the dry beans.
Beans That Don’t Require Soaking
A few varieties of beans and legumes do not require soaking, therefore requiring somewhat different cooking methods. If making lentils, adzuki beans, or split peas, sort and rinse them, and then cook as directed:
Lentils or Split Peas: Combine 1 cup of lentils or split peas with 2 cups of water in a saucepan. Cover and simmer for about 30 minutes on medium or medium-low until tender.
Adzuki Beans: Add 3-4 cups of water and 1 cup of adzuki beans in a large saucepan or Dutch oven. Bring to a boil, then reduce the heat and simmer covered for 40-50 minutes until tender.
How to Make Beans Less Gassy
Baking Soda. Add a teaspoon of baking soda to the water when you soak the beans. It helps to reduce the oligosaccharides which cause bloating.
Replace the Water. After soaking your beans, drain and rinse them in a colander before cooking.
Kombu Seaweed. Cook your beans with a piece of kombu seaweed. Like baking soda it helps to reduce one of the sugars, raffinose, in beans that causes bloat.
Cook Thoroughly. Don’t rush the cook time of beans. They must be thoroughly cooked before eating. Most beans cook within 90 minutes, but if your beans are taking longer, let em’ cook!
Eat Them More Often. Most people grow accustomed to eating beans when they consume them regularly.
Seasoning Variations
Add your own spin to these tender, creamy beans with any of these optional swaps and add-ins:
Herbs: Add a fresh sprig of rosemary or thyme for herbaceousneous or stir in your favorite dried herb blend, such as Italian or Herbes de Provence seasoning.
Aromatics: Stir in sliced leeks, green onion (scallions), or fennel; minced shallot or ginger; or even diced carrots to suit your tastes before simmering.
Olive Oil: Finish the beans with a rich peppery flavor by stirring in a tablespoon or two of high-quality olive oil.
Seasonings: Add some spice by sprinkling in black, white, or pink peppercorns, smoked salt, or dried chiles.
Storage Directions
Refrigerating: Once cooled to room temperature, the leftover beans can be kept in an airtight container in the fridge for up to 5 days.
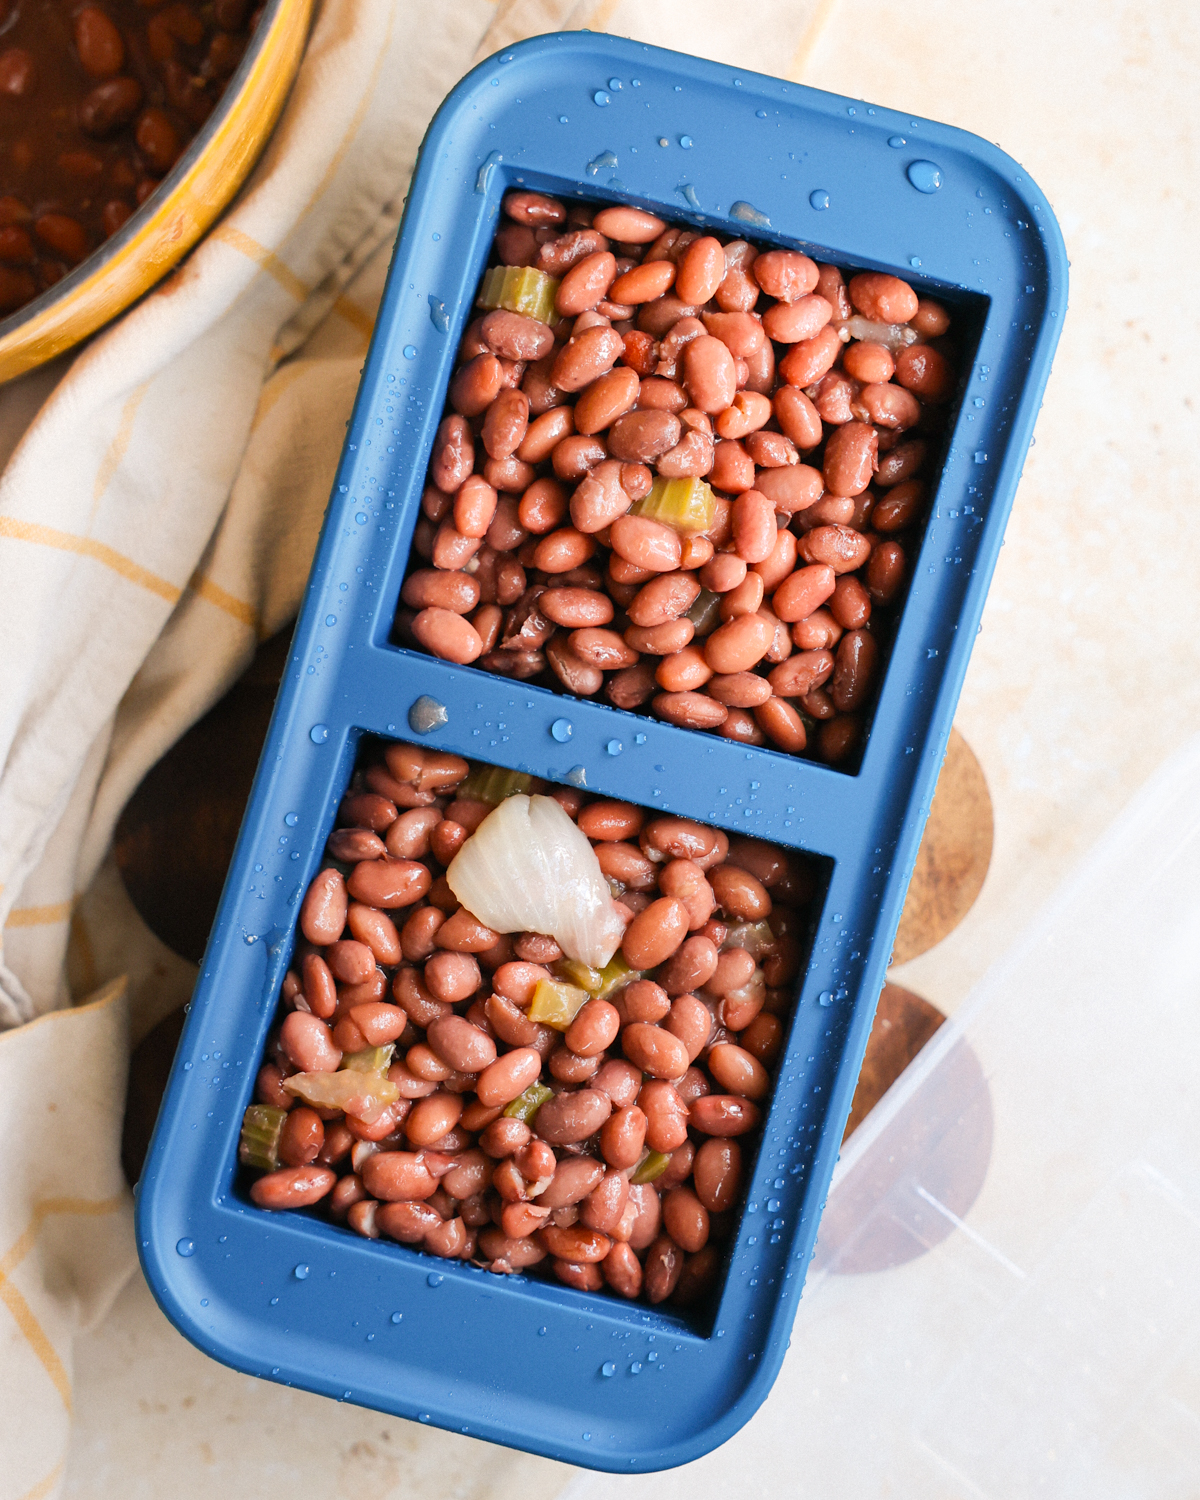
Freezing: For longer storage, the cooled beans can also be frozen in a freezer-safe container for up to 3 months. For easy, meal-prep-friendly defrosting, portion the beans in a silicone tray before freezing (as shown below).
Bean Recipes
Now that you have your perfectly simmered, tender, and creamy beans, you can add them to all your favorite meals, such as:
Cook ModePrevent your screen from going dark
Sort the beans, removing debris or irregular pieces.
Add the dry beans to a large bowl or pot. Cover them with at least an inch of cool water. Cover and let the beans soak for 8 hours or overnight.
Drain and rinse the soaked beans in a colander, then transfer them to a Dutch oven and cover with the water or stock/broth. Add the bay leaves, onion, garlic, and celery (if using). Cover the pot with a lid and bring it to a boil. Skim off any white foam that floats on top of the water.
Reduce the heat to medium-low simmer the beans with the lid ajar until they are tender, about 60 minutes for most beans. This may take up to 90 minutes for some beans, like kidney beans. Check their doneness at the 45- and 60-minute marks and add on simmering time as needed. Add more liquid if needed.
Season the beans with salt in the last 5 minutes of cooking time. If you’d like creamier beans, add a couple of tablespoons of oil, or use a spoon to mash some beans on the side of the pot.
Refrigerating: Once cooled to room temperature, the leftover beans can be kept in an airtight container in the fridge for up to 5 days.
Freezing: For longer storage, the cooled beans can also be frozen in a freezer-safe container for up to 3 months. For easy, meal-prep-friendly defrosting, portion the beans in a silicone tray before freezing.
Jenné’s Recipe Pro-Tips
Don’t skip the sort and rinse! Even the package of high quality beans can occasionally contain small pieces of debris (think: pebbles, dirt, or insects) or mis-shapen, discolored, or shriveled beans. Remove them before rinsing the beans thoroughly in a colander to remove any dust or dirt.
Skip the foam off the top. This sudsy, off-white layer contains starches, proteins, and the compounds (oligosaccharides) which can cause gas and digestive issues. Removing it improves the beans’ flavor and makes them easier to digest.
Test for doneness. Many factors—such as their freshness, water mineral content, altitude, and more— affect how quick or slowly the beans cook. Check them at the 45 and 60 minute marks and add on additional simmering time as needed.
Add additional time for altitude. If cooking at 3,500 feet or higher, you may need to add 15-30 minutes of simmering time, as the lower atmospheric pressure necessitates longer a longer simmering time (source).
Mind water hardness. Beans will need to simmer longer in hard water, as it contains extra minerals that can make it more difficult for the water to penetrate the bean skins.
Make them creamy. For a silkier texture, add up to two tablespoons of grapeseed oil or another oil (such as olive or avocado oil), or smash some of the beans with a spoon during the final few minutes of cooking.
Calories: 205kcal | Carbohydrates: 38g | Protein: 13g | Fat: 1g | Saturated Fat: 0.1g | Polyunsaturated Fat: 0.3g | Monounsaturated Fat: 0.1g | Sodium: 1302mg | Potassium: 810mg | Fiber: 9g | Sugar: 3g | Vitamin A: 421IU | Vitamin C: 4mg | Calcium: 54mg | Iron: 4mg