
Our sourdough starter recipe doesn’t just create an ingredient that helps you make one of the most flavorful loaves of bread you’ll ever have.
It makes a living culture that captures wild yeast from the air in your kitchen and turns it into flavor, structure, and character.

It takes about 5-7 days to build a strong starter, but once it’s alive and thriving, you’ve got the foundation for incredible sourdough bread, pizza crust, pancakes, and more.
There are no shortcuts for a good sourdough starter, no packets of yeast. Just real fermentation, the way bakers have done it for centuries.

Sourdough fermentation dates back thousands of years to ancient Egypt. Long before there were foil packets of yeast, there were crocks bubbling away in kitchens and bakeries around the world.
From San Francisco to rural Europe, sourdough starters were passed down like heirlooms. Each one develops its own personality depending on flour type, temperature, and feeding schedule, making each starter uniquely yours.
If you love everything sourdough, make sure to try our Sourdough Discard Brownies and Sourdough Discard Banana Muffins with Chocolate Chips recipes.
Table of Contents:
View more
Ingredients

Gather the ingredients to prepare our sourdough starter recipe. Culinary professionals call this the “Mise en Place,” which means “everythingin its Place.”
Setting up your ingredients not only helps speed up the cooking process but also ensures you have everything you need on hand to make the recipe.
Recipe Variations
All-Purpose Flour can be used, but the process will take a little longer.
Bread Flour can be used, but bread flour is thirsty and will need more water.
Rye Kickstart (Days 1-3 Only) – Start with 50% rye flour to jumpstart microbial activity, then transition to bread flour for balance.
Stiff Starter (Low Hydration) – Use less water for a firmer culture. Slower fermentation, milder flavor.
50% Hydration “Italian Style” – Creates a tighter crumb structure and a slightly sweeter fermentation profile.
High-Hydration Starter (100% hydration) – Equal weights flour and water for predictable scaling into bread formulas.
How to Make Sourdough Starter
Follow my simple step-by-step instructions to learn how to make sourdough starter in your home kitchen.

Add the whole-wheat flour and water to a large, sealable glass jar.
Using a fork, mix until smooth; the consistency will be thick and pasty.
Cover loosely with a tea towel or parchment paper, and let it rest at room temperature in a warm spot in the kitchen, for 24 hours
On the second day, the starter will appear dark on top. It might even have some liquid (hooch) on top.

Scrape down the starter off the sides of the jar, cover loosely, and let it rest in the warm spot for another 24 hours.
Remove and discard approximately half of the starter from the jar, then feed the starter with all-purpose flour and water.
Mix with a fork until smooth. The texture should resemble a thick batter.
Cover loosely with a tea towel or parchment paper, and let it rest at room temperature in a warm spot in the kitchen for 24 hours.

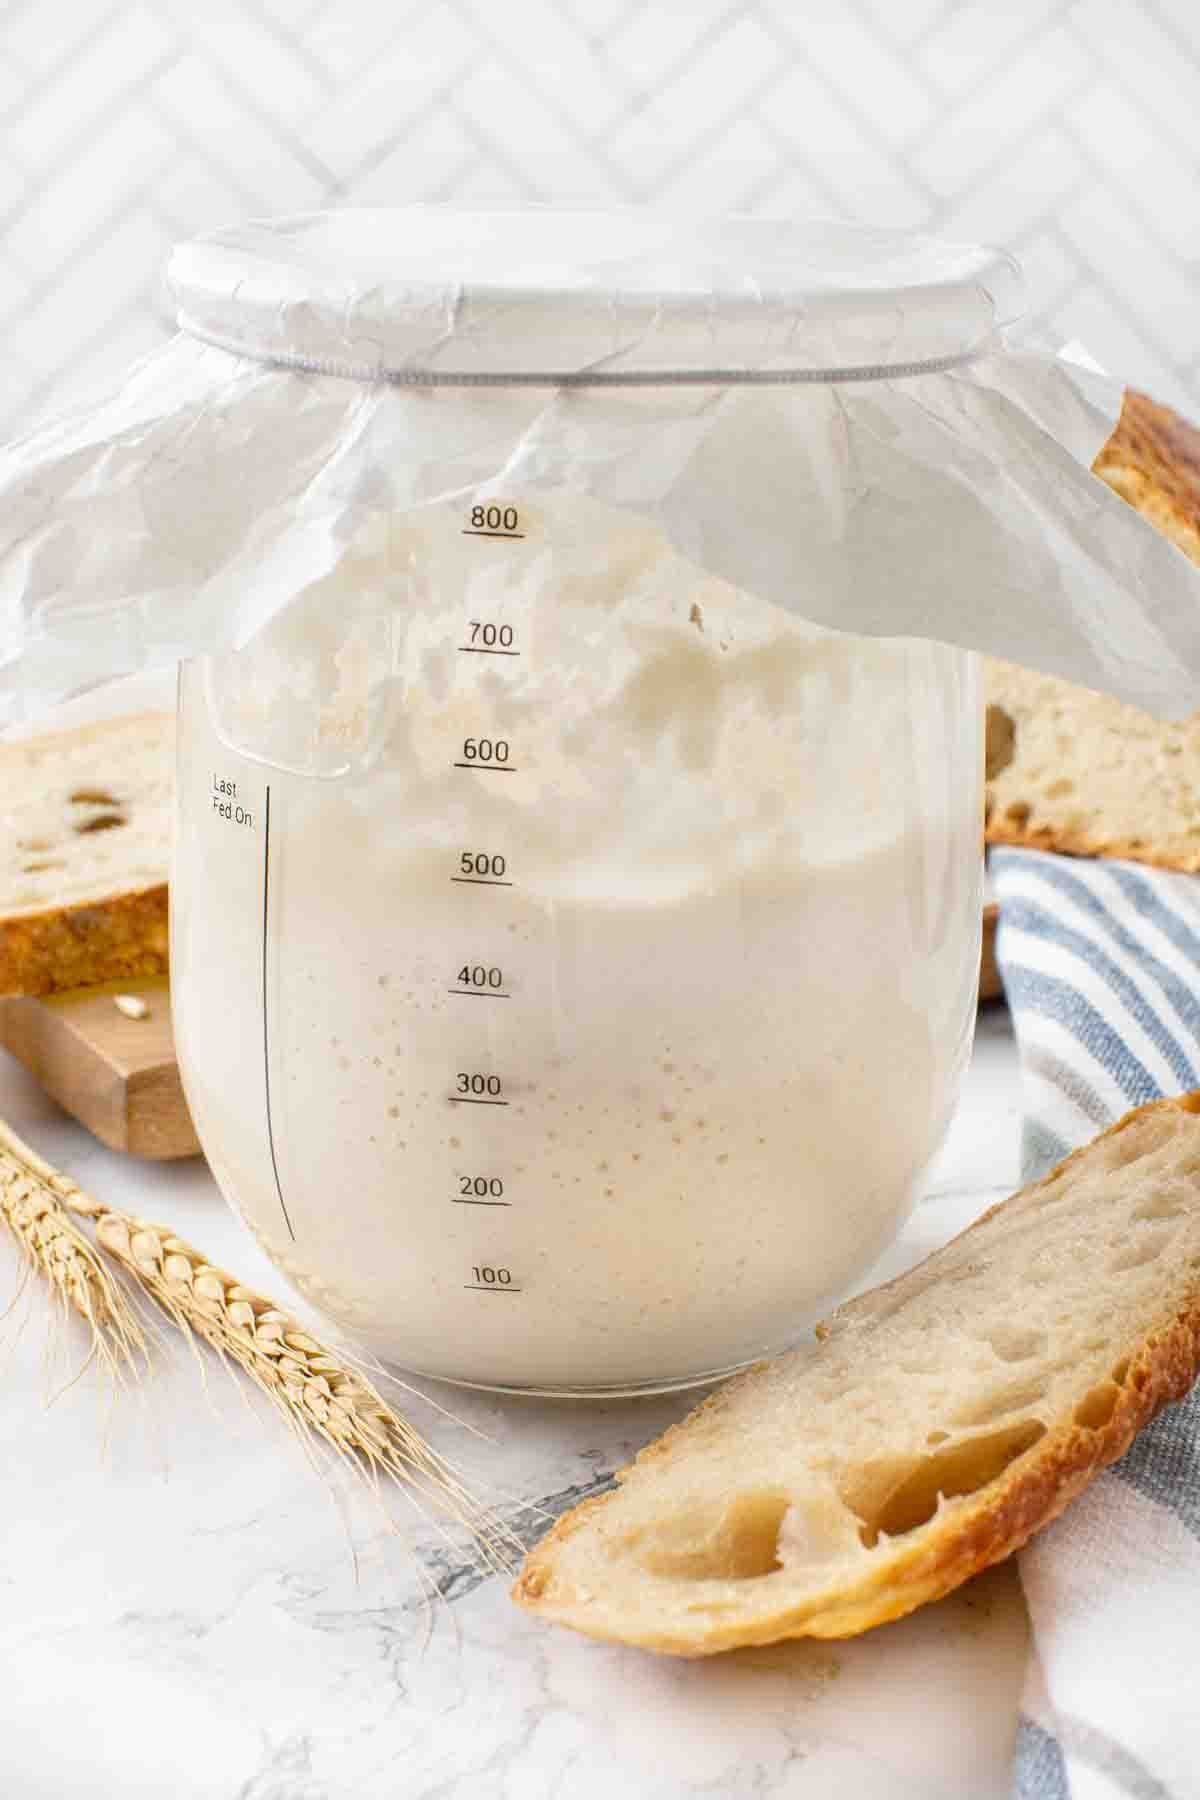
As the yeast begins to ferment, the starter will rise, and bubbles will form on the surface and throughout the mixture.
Remove and discard approximately half of the starter from the jar.
Feed the starter with all-purpose flour and water.
Mix with a fork until smooth. The texture should resemble a thick batter.
Cover loosely, and let it rest in the warm spot for another 24 hours.
Repeat the feeding process on days 4, 5, and 6
Chef Tips
Weigh the flour.
Keep starter at 70-75°F for best results. If you see liquid (hooch) on top, it’s hungry; feed it.
It should smell pleasantly tangy, not rotten.
Temperature controls speed; warmer = faster, cooler = slower fermentation.
Don’t panic during the “dead zone” (Days 3-4). That lull is a normal bacterial shift.
Mark your jar with a rubber band or masking tape to track doubling.
If it doesn’t double, it’s not ready.
Sourdough starter isn’t complicated. What throws people off is the waiting. They think bubbles mean success, but activity doesn’t equal strength. Strength means it doubles consistently within a few hours after feeding. That’s your benchmark. And don’t baby it. If you feed it properly and keep it warm enough, it’ll do its job.

Once you get comfortable with our sourdough starter recipe, it becomes second nature. Feed it, bake with it, repeat. It’s one of the most rewarding kitchen skills you’ll ever learn.
It doesn’t get much better than a freshly baked sourdough bread. And the aroma that fills the kitchen is pure magic.
Serving Suggestions
Served warm, slathered with European butter, and sprinkled with flaky sea salt.
Dipped in an egg batter to make sourdough French toast.
Toasted and served with butter and homemade strawberry jam.
Storage & Maintenance
Room Temperature: Feed daily.
Refrigerated: Feed weekly.
Long-Term: Can be dried and stored.
To revive refrigerated starter: Feed 2-3 times at room temperature before baking.
Recipe FAQs
It’s a normal lull phase. Just keep feeding it.
Only if it’s chlorine-free. Use filtered tap water or bottled spring water for best results.
It’s a liquid alcohol layer, and that means your starter is hungry.
More Recipes You’ll Love!

Sourdough Starter Recipe
Once you get comfortable with our sourdough starter recipe, it becomes second nature. Feed it, bake with it, repeat. It’s one of the most rewarding kitchen skills you’ll ever learn.
]]>
Ingredients
.5x1x2x
To feed the sourdough starter days 3-7
60 g unbleached all-purpose flour ½ cup 60 g water ¼ cup
Instructions
Making a Sourdough Starter
Combine ½ cup (60g) of whole wheat flour and ¼ cup (60 g) of water in a large sealable glass jar. Using a fork, mix until smooth; the consistency will be thick and pasty. Cover loosely with a tea towel or parchment paper, and let it rest at room temperature in a warm spot in the kitchen, for 24 hours.
Day 2: Feed the Starter
Remove and discard approximately half of the starter from the jar.
Feed the starter with ½ cup (60 g) of all-purpose flour and ¼ cup (60 g) of water. Mix with a fork until smooth. The texture should resemble a thick batter.
Day 3, 4, 5 & 6: Keep Feeding the Starter
Repeat the feeding process outlined on Day 2 (remove and discard half of the starter, and feed it with ½ cup (60g) of all-purpose flour and ¼ cup (60g) of water. As the yeast begins to ferment, the starter will rise, and bubbles will form on the surface and throughout the mixture. During the first week of feeding, you can transfer the starter to a clean jar. Continue to cover with parchment paper until day 7.
Day 7: Sourdough Starter is Ready
Notes
All-Purpose Flour can be used, but the process will take a little longer.
Bread Flour can be used, but bread flour is thirsty and will need more water.
Rye Kickstart (Days 1-3 Only) – Start with 50% rye flour to jumpstart microbial activity, then transition to bread flour for balance.
Stiff Starter (Low Hydration) – Use less water for a firmer culture. Slower fermentation, milder flavor.
50% Hydration “Italian Style” – Creates a tighter crumb structure and a slightly sweeter fermentation profile.
High-Hydration Starter (100% hydration) – Equal weights of flour and water for predictable scaling into bread formulas.
Chef Tips
Weigh the flour.
Keep starter at 70-75°F for best results. If you see liquid (hooch) on top, it’s hungry; feed it.
It should smell pleasantly tangy, not rotten.
Temperature controls speed; warmer = faster, cooler = slower fermentation.
Don’t panic during the “dead zone” (Days 3-4). That lull is a normal bacterial shift.
Mark your jar with a rubber band or masking tape to track doubling.
If it doesn’t double, it’s not ready.
Sourdough starter isn’t complicated. What throws people off is the waiting. They think bubbles mean success, but activity doesn’t equal strength. Strength means it doubles consistently within a few hours after feeding. That’s your benchmark. And don’t baby it. If you feed it properly and keep it warm enough, it’ll do its job.
Serving Suggestions
Served warm, slathered with European butter, and sprinkled with flaky sea salt.
Dipped in an egg batter to make sourdough French toast.
Toasted and served with butter and homemade strawberry jam.
Storage & Maintenance
Room Temperature: Feed daily.
Refrigerated: Feed weekly.
Long-Term: Can be dried and stored.
To revive refrigerated starter: Feed 2-3 times at room temperature before baking.
Recipe FAQs
Why did my starter stop bubbling?
It’s a normal lull phase. Just keep feeding it.
Can I use tap water?
Only if it’s chlorine-free. Use filtered tap water or bottled spring water for best results.
What is hooch?
It’s a liquid alcohol layer, and that means your starter is hungry.