
This post may contain affiliate links. Read my full disclosure policy.
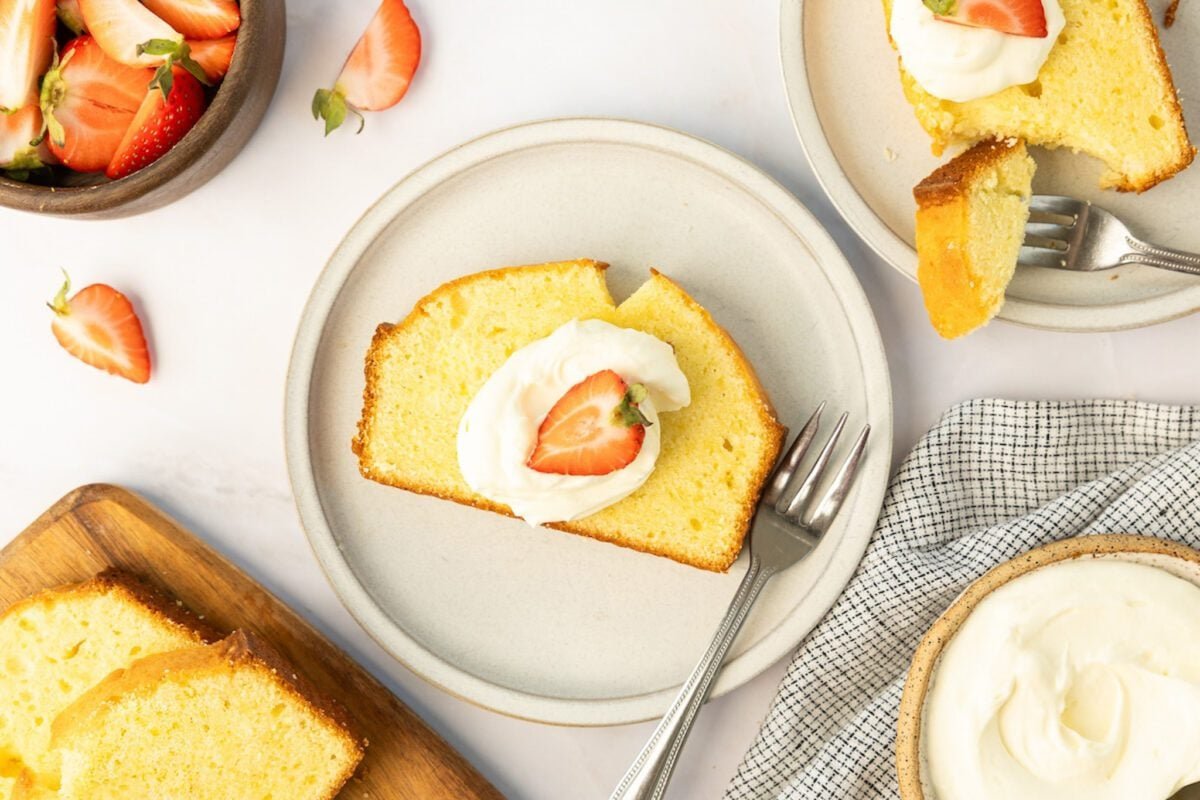
Sometimes all you need is a simple loaf cake, and this cream cheese pound cake delivers—rich, tender, and easy enough to make anytime, whether you keep it simple or dress it up.
Pound cake dates back centuries and was originally made with a pound each of butter, sugar, eggs, and flour. Over time, bakers have created countless variations, and this cream cheese pound cake is a Southern favorite. The addition of cream cheese gives the cake a velvety texture and a subtle tang that nicely balances the sweetness.
Golden and rich with plenty of vanilla flavor, it’s perfect on its own with coffee or tea, as an easy dessert after dinner, or wrapped up and brought along when you need something simple to share. If you’d like to dress it up, serve it with fresh berries, berry sauce, or whipped cream, or simply dust it with powdered sugar.
What You’ll Need To Make Cream Cheese Pound Cake
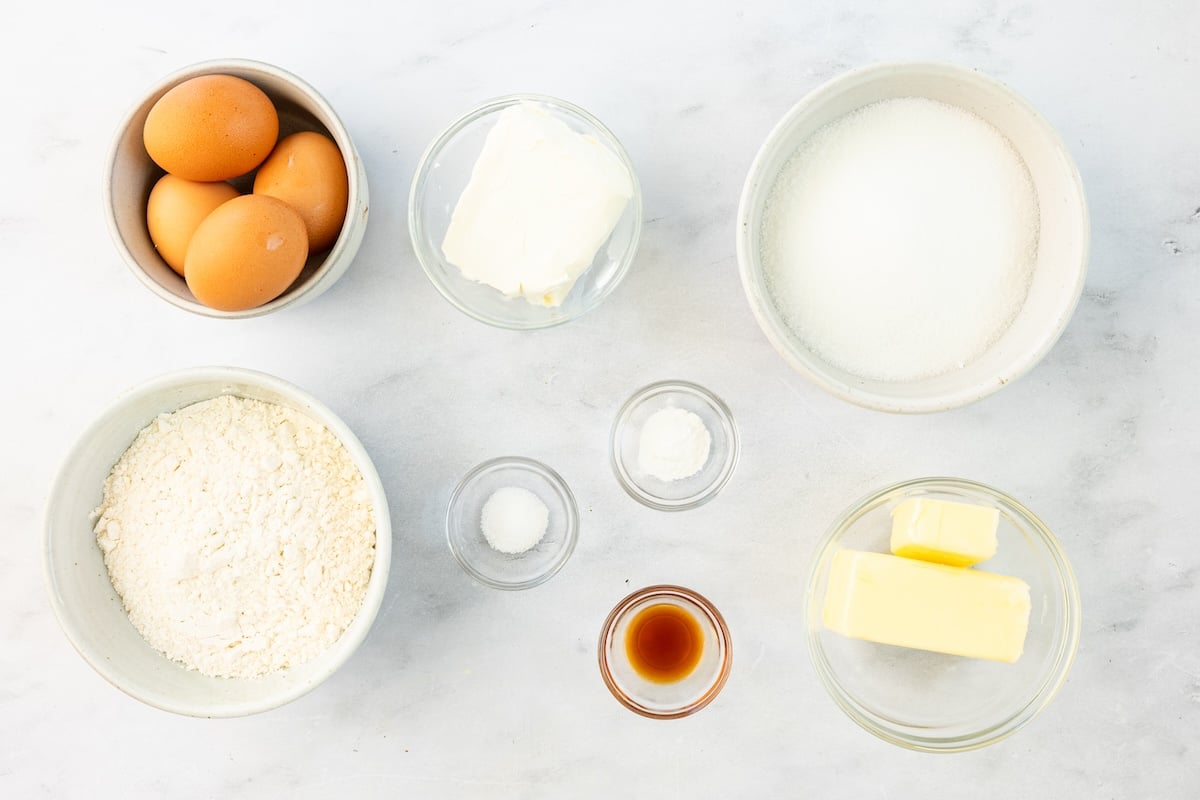
To make this simple cream cheese pound cake recipe, you’ll need all-purpose flour, baking powder, salt, butter, cream cheese, granulated sugar, large eggs, and vanilla extract.
Step-By-Step Instructions
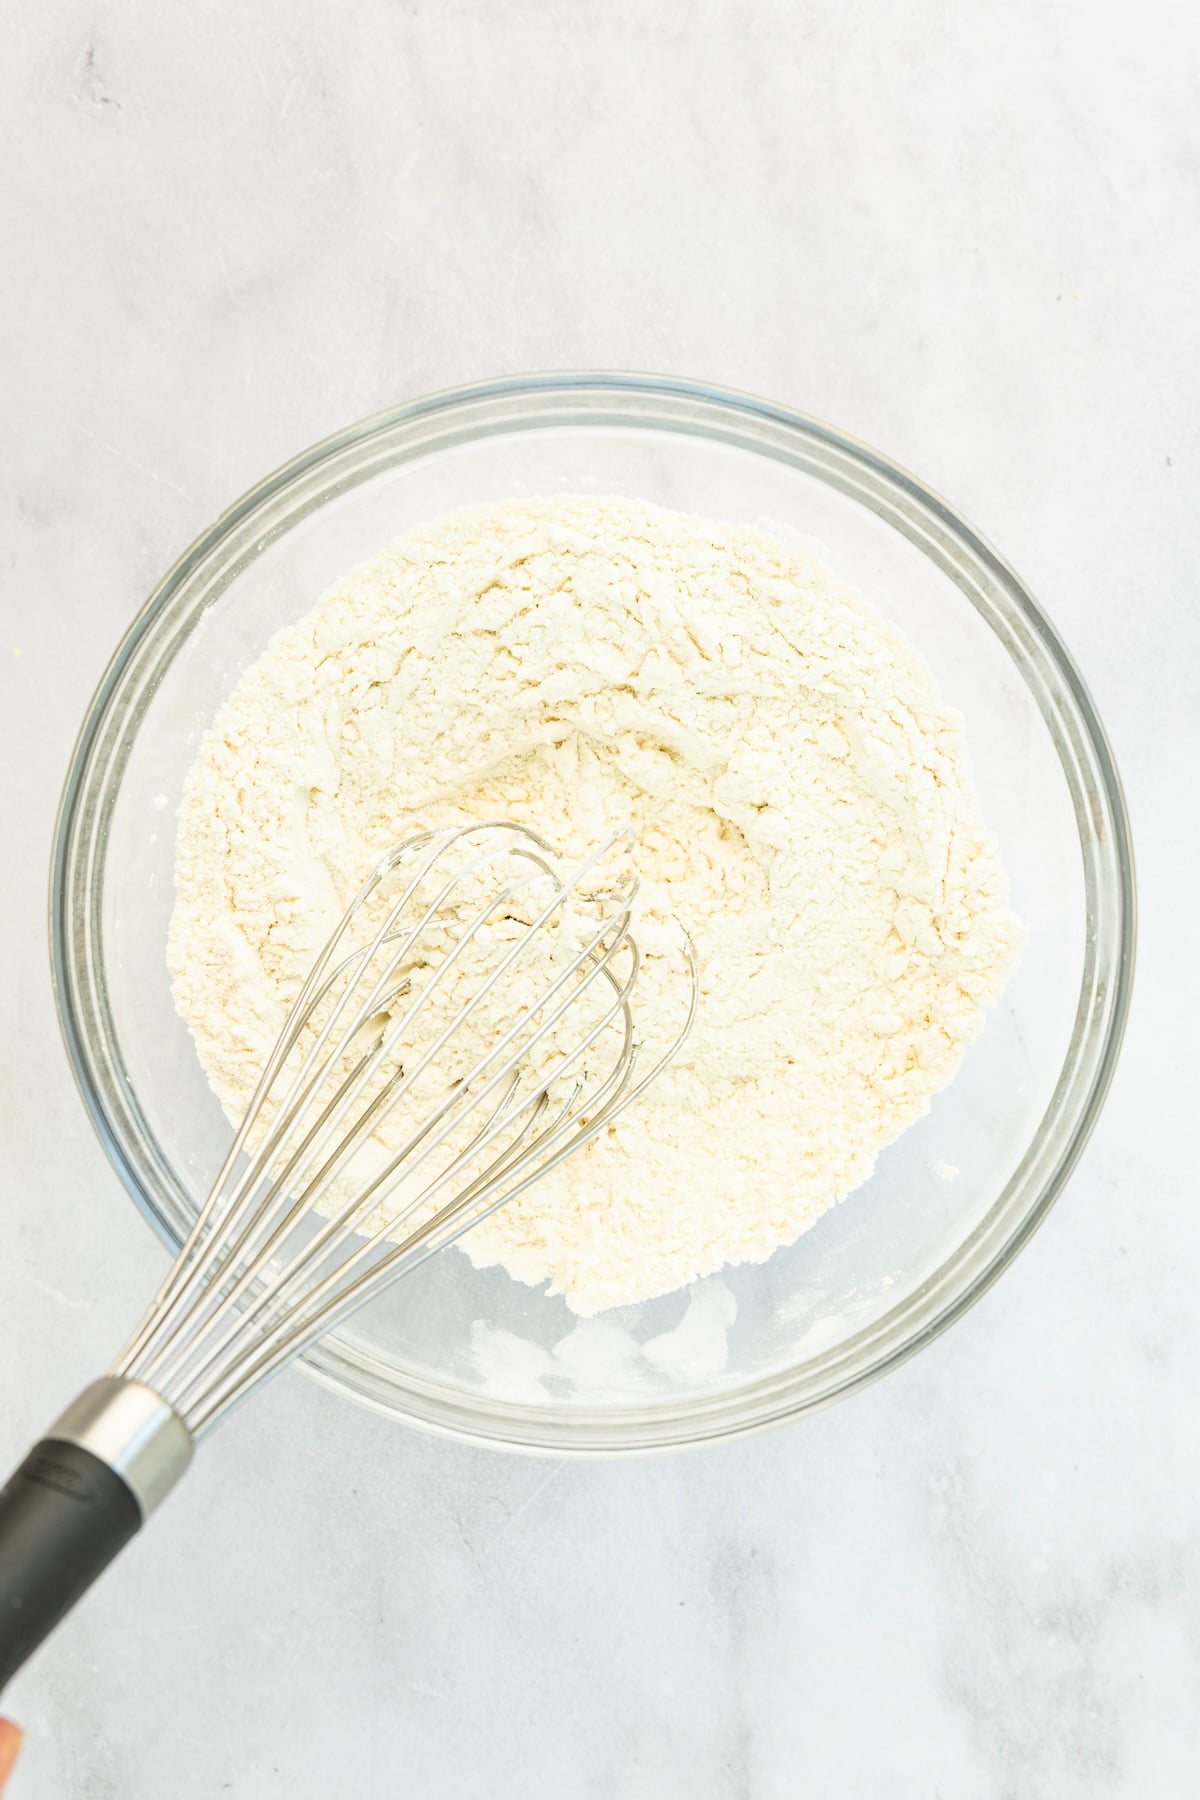
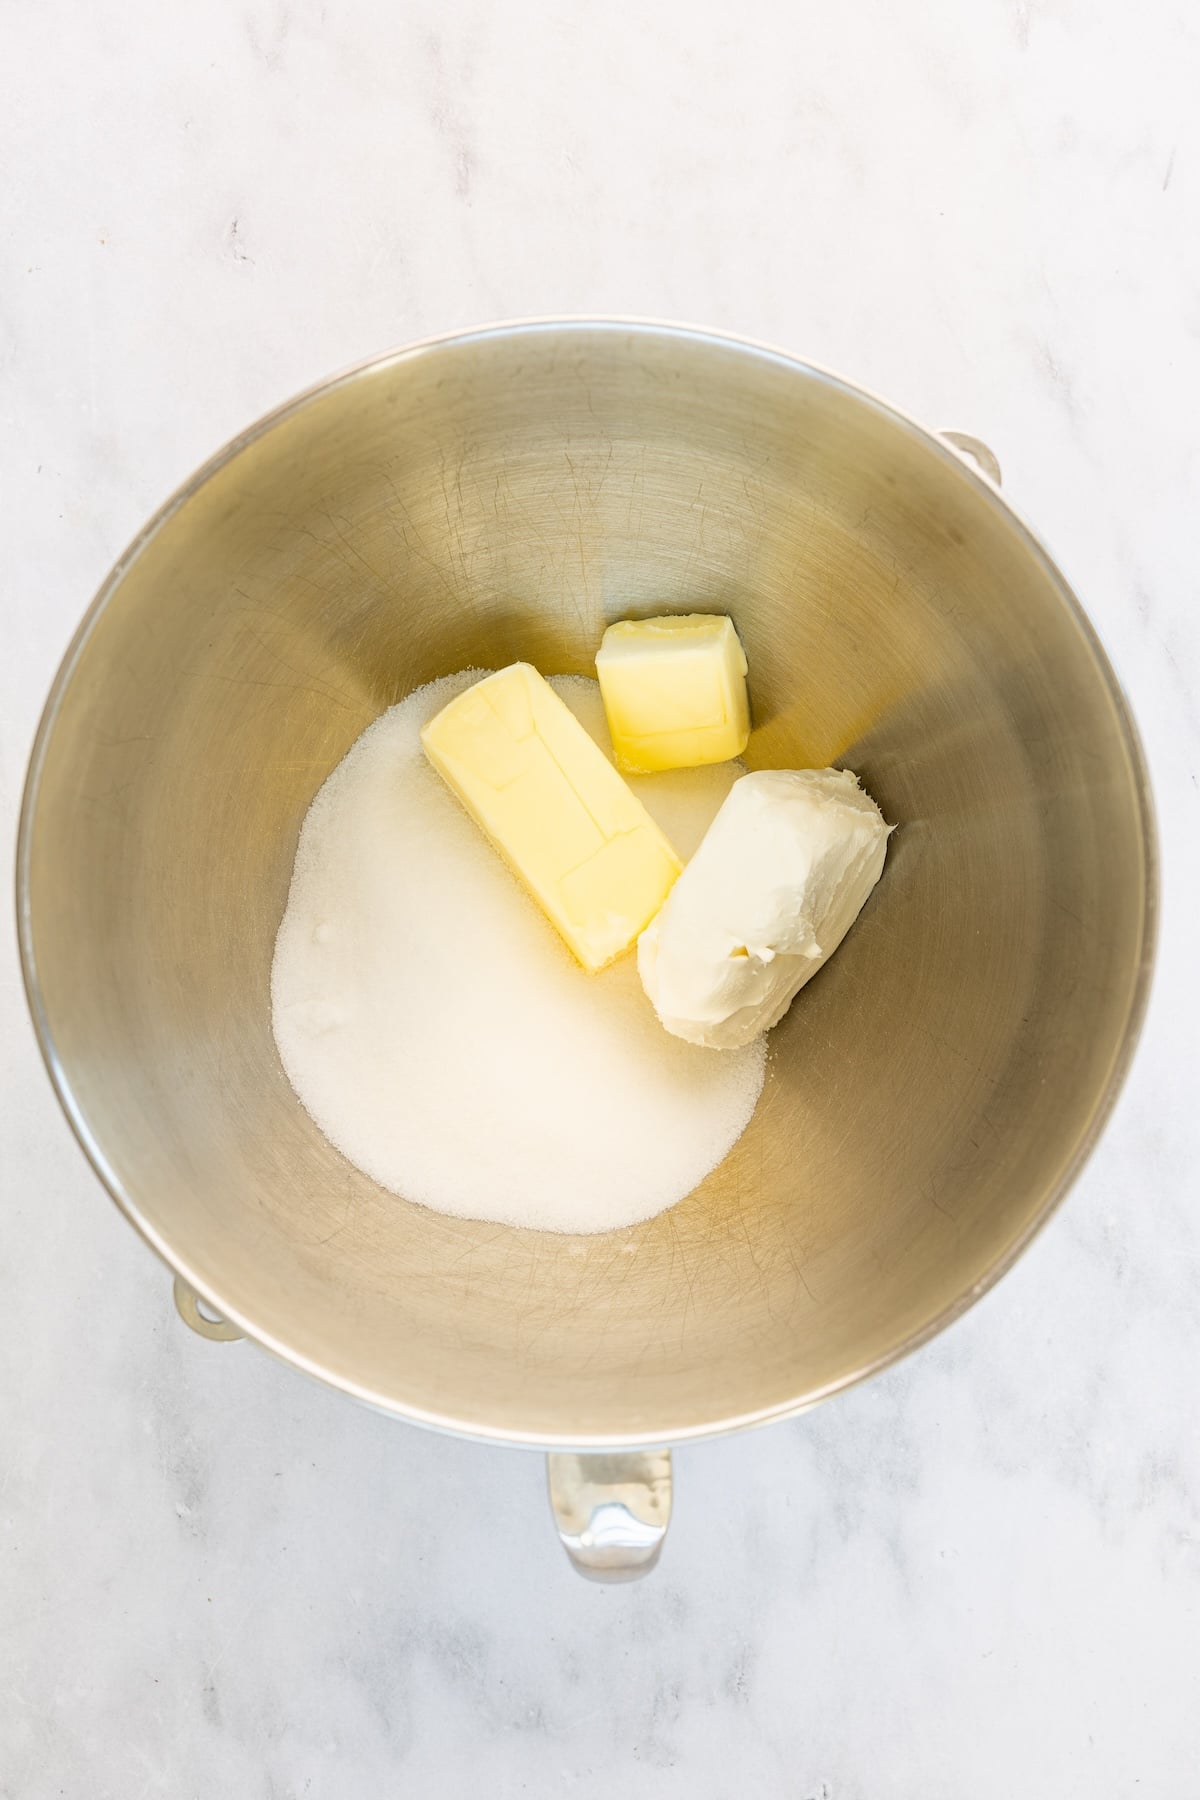
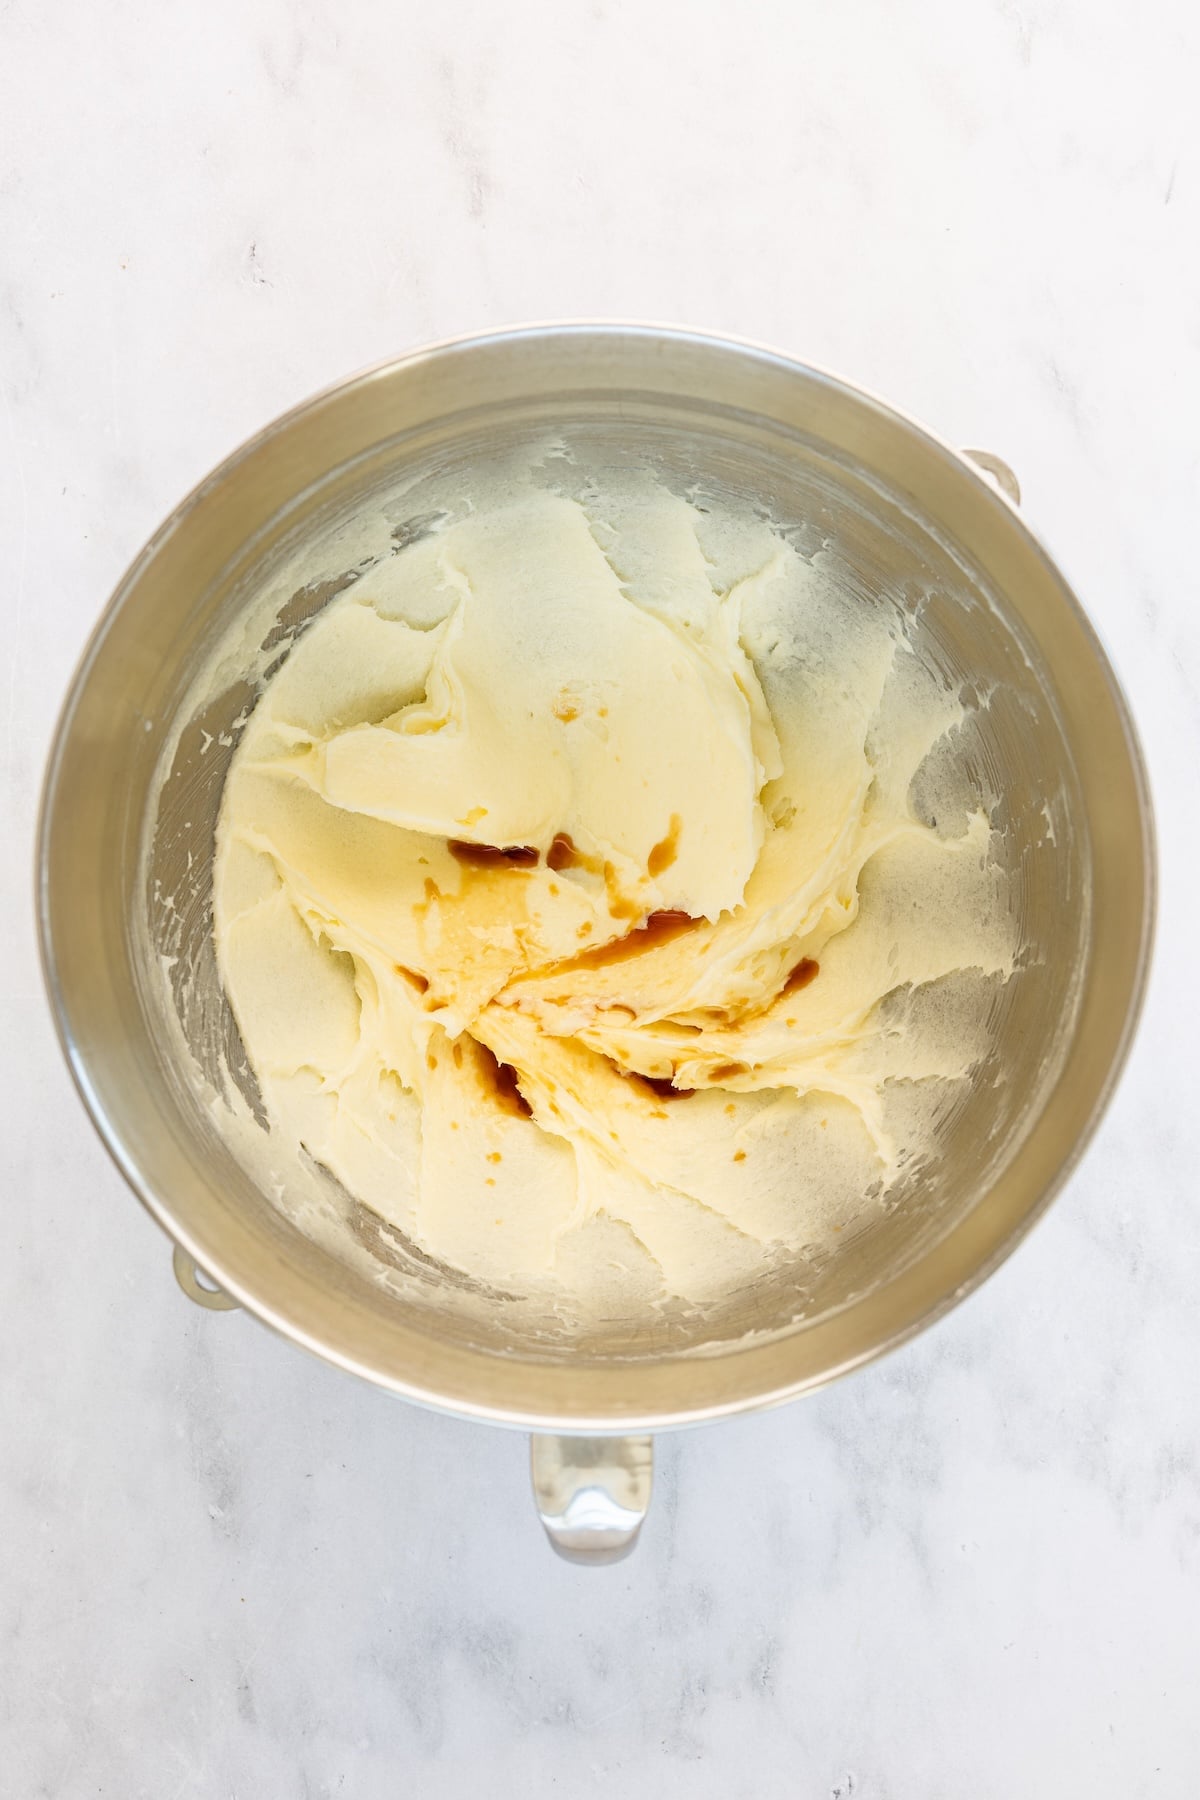
Step 1. Mix the dry ingredients and cream the butter, cream cheese, and sugar. In a medium bowl, whisk together the flour, baking powder, and salt. Next, in the bowl of an electric mixer fitted with the paddle attachment (or use beaters), beat the butter, cream cheese, and sugar on medium speed until light, about 3 minutes.
Pro Tip: Your butter and cream cheese are soft enough when a finger press leaves a deep indentation. To speed things up, microwave the butter and cream cheese (unwrapped) in short 10-second intervals until just softened (but not melted).
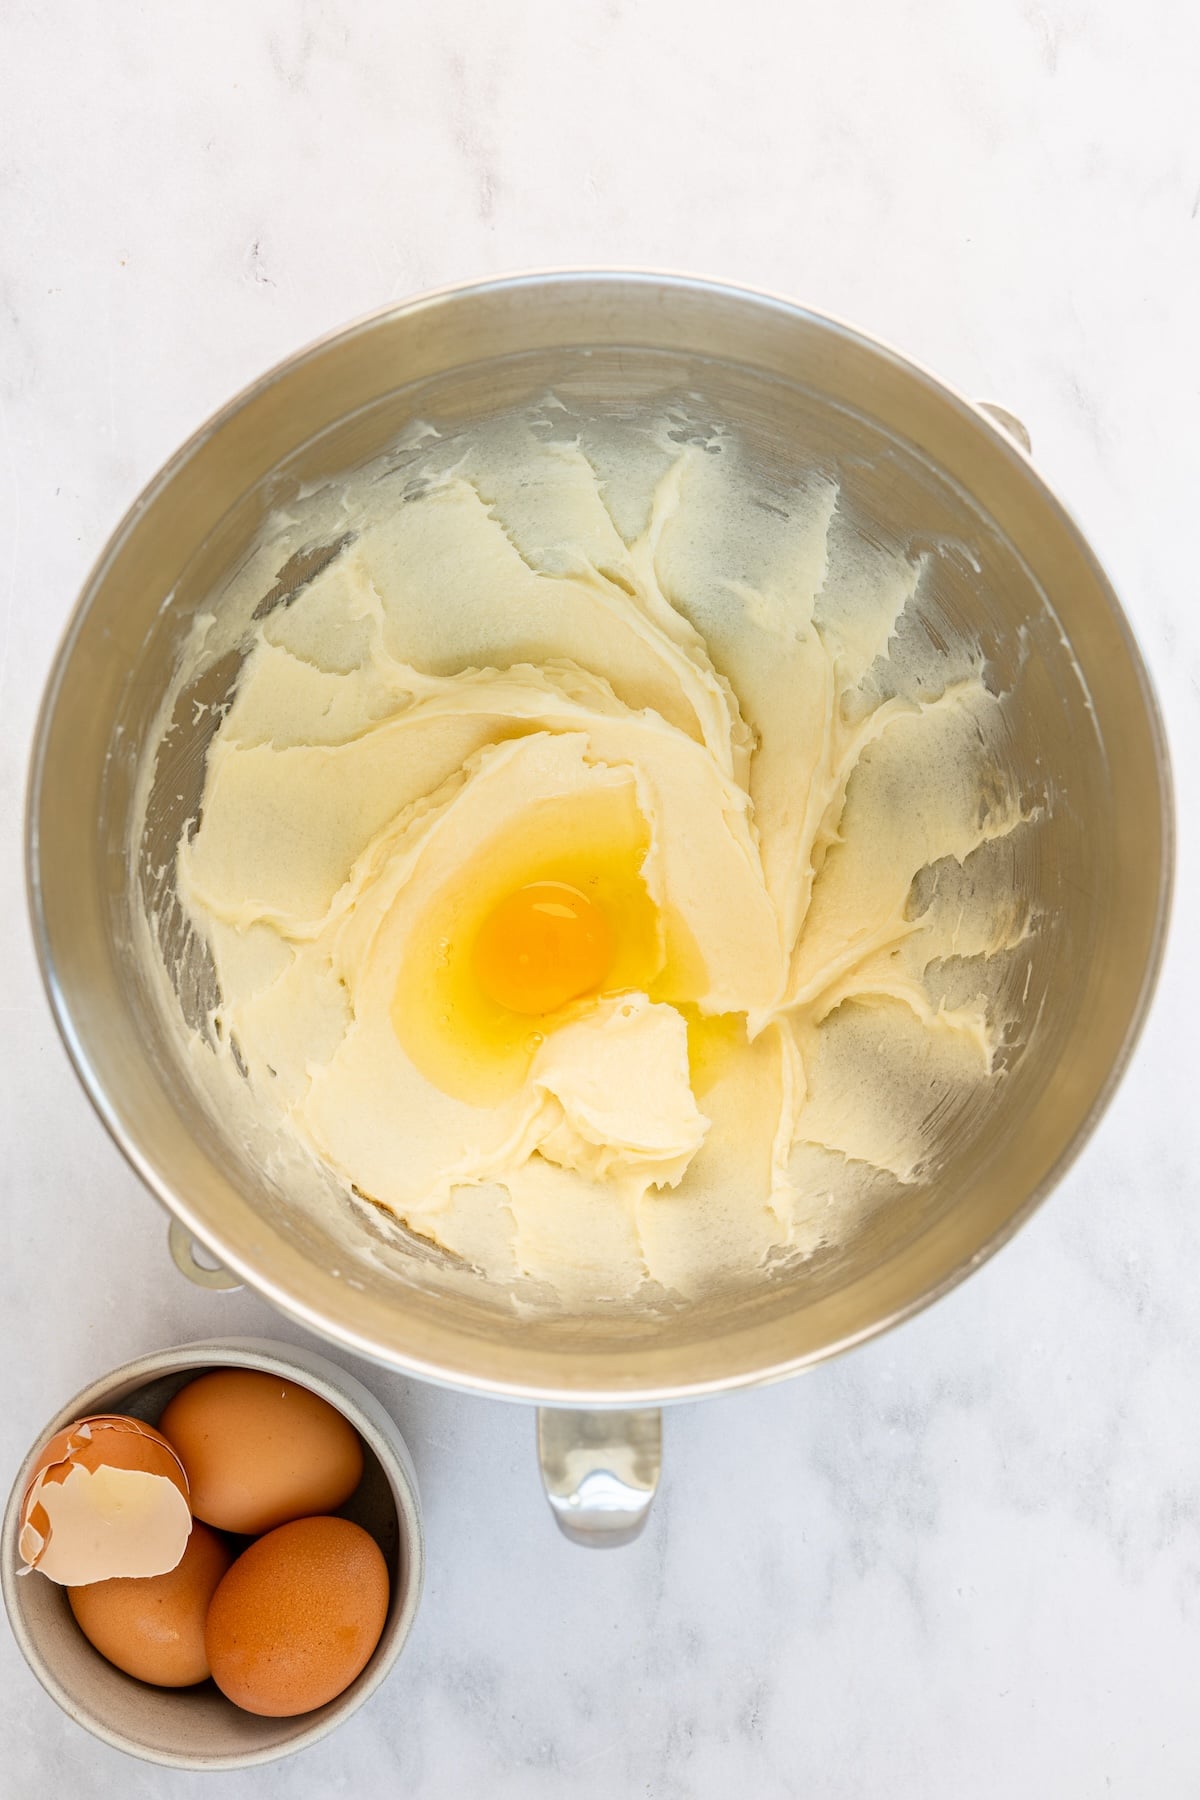
Step 2. Add the vanila and eggs. Mix in the vanilla, then add the eggs one at a time, beating until smooth—about 10 seconds per egg—and scraping the bowl as needed.
Pro Tip: Adding the eggs one at a time ensures the fat in the butter and cream cheese can emulsify with the liquid in the eggs.
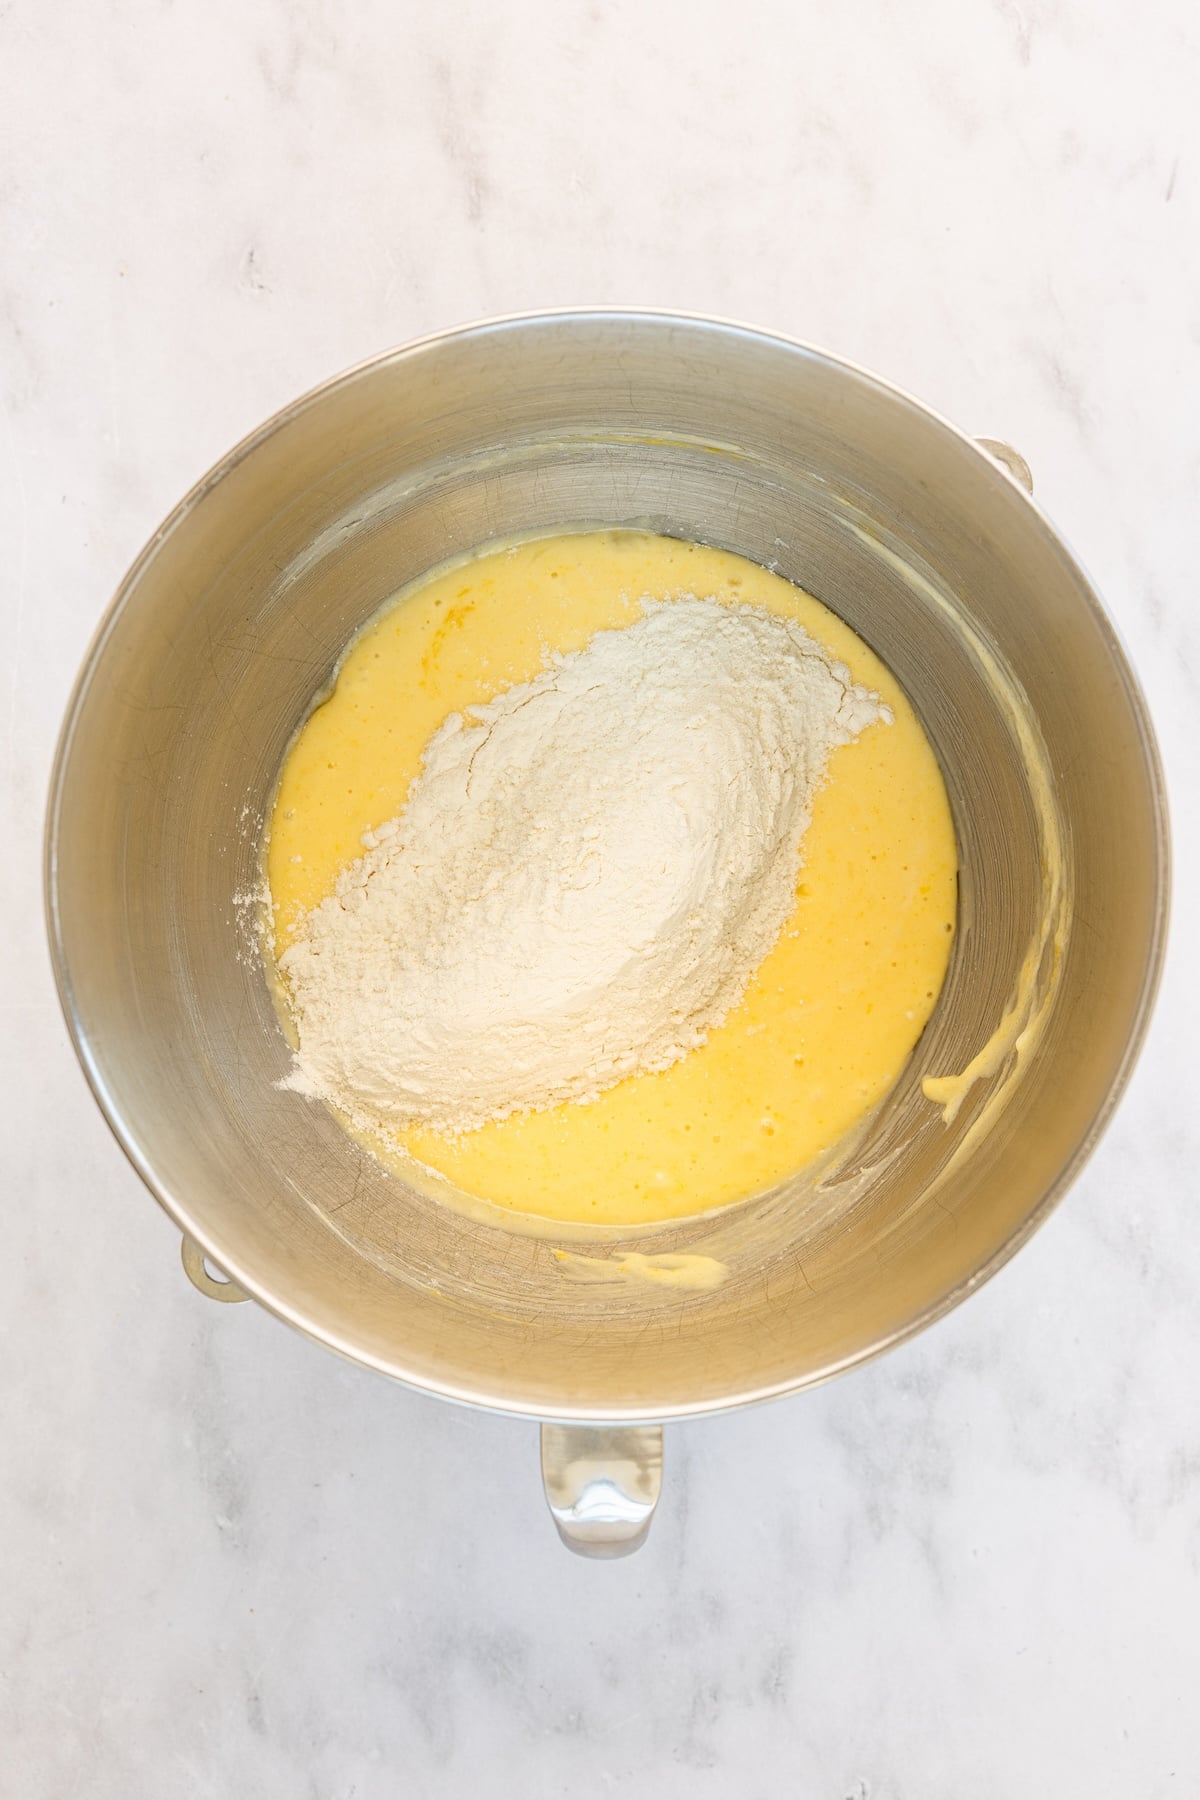
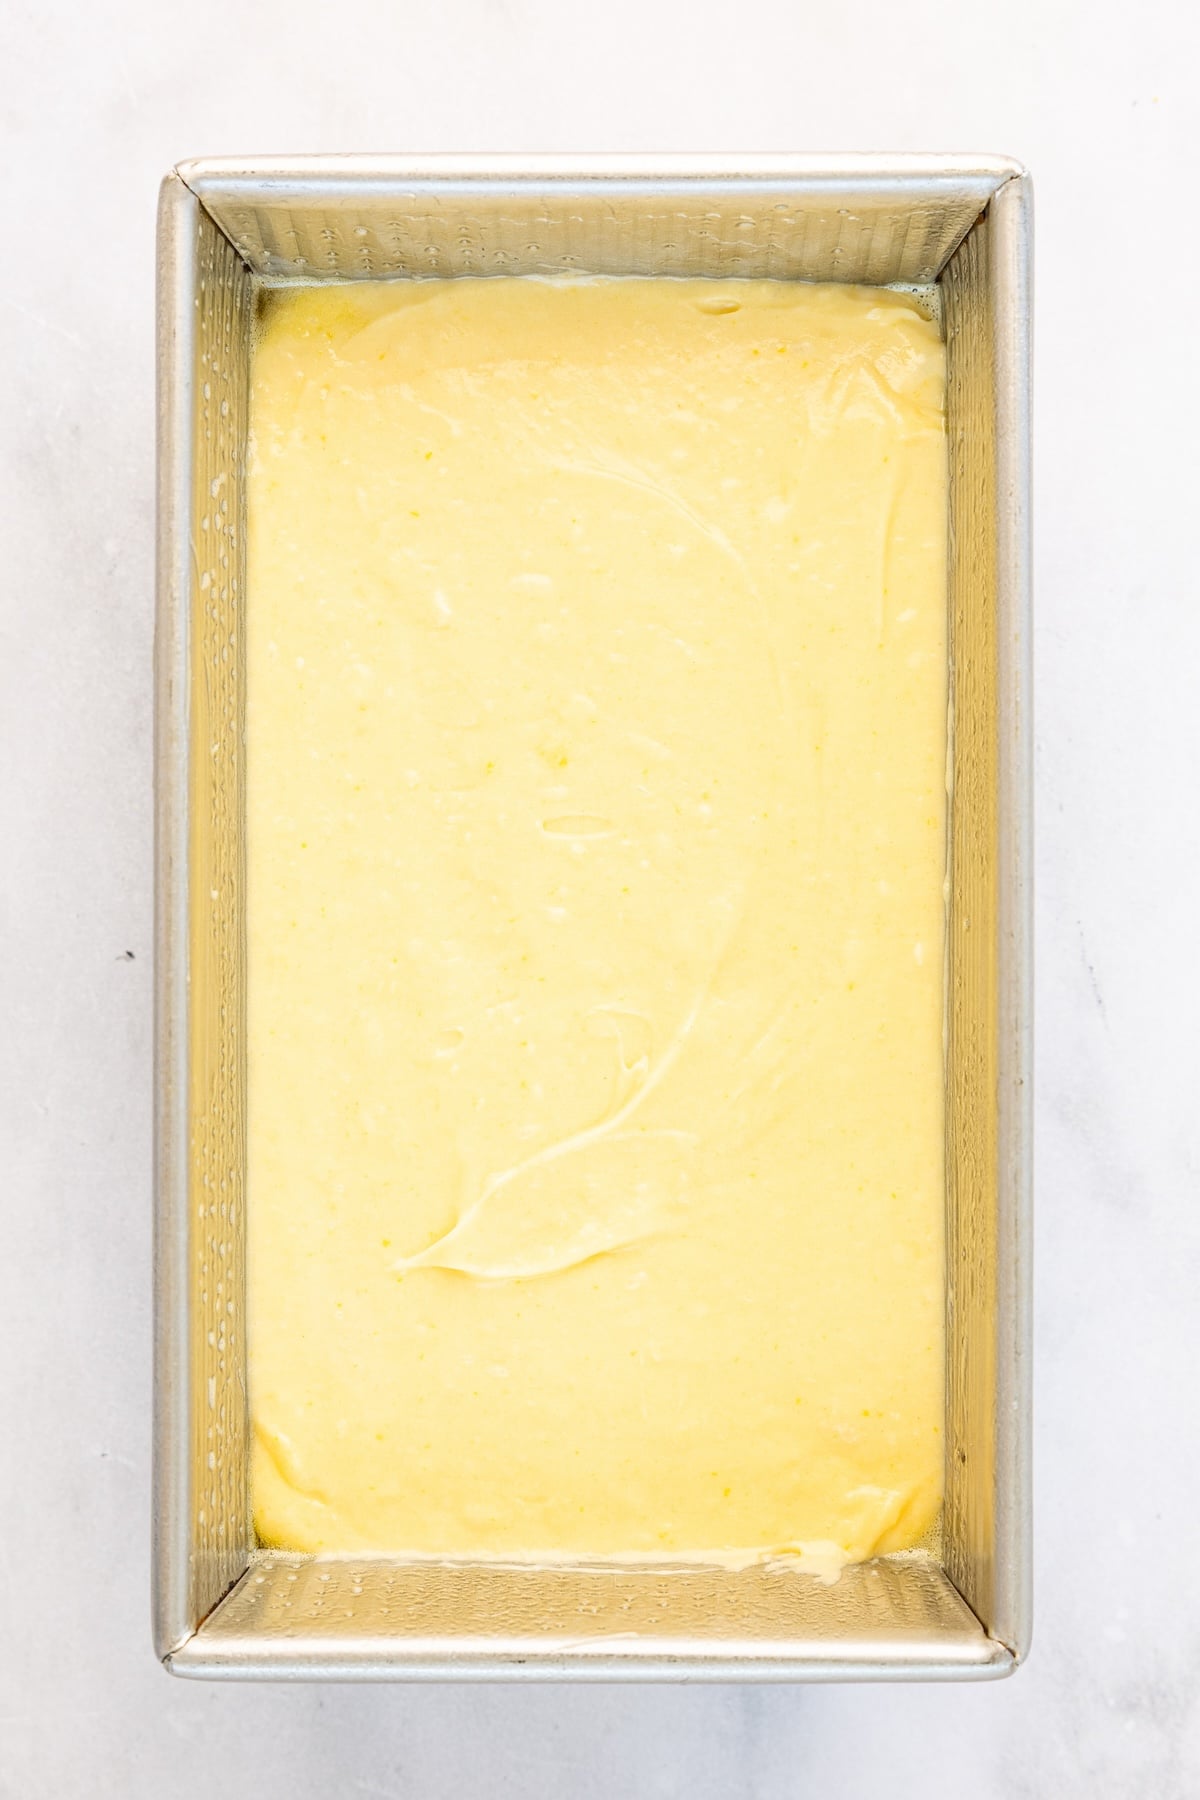
Step 3. Add dry ingredients. Add the flour mixture and beat on low speed until just combined. Scrape down the bowl as needed, then give the batter a final mix with a spatula.
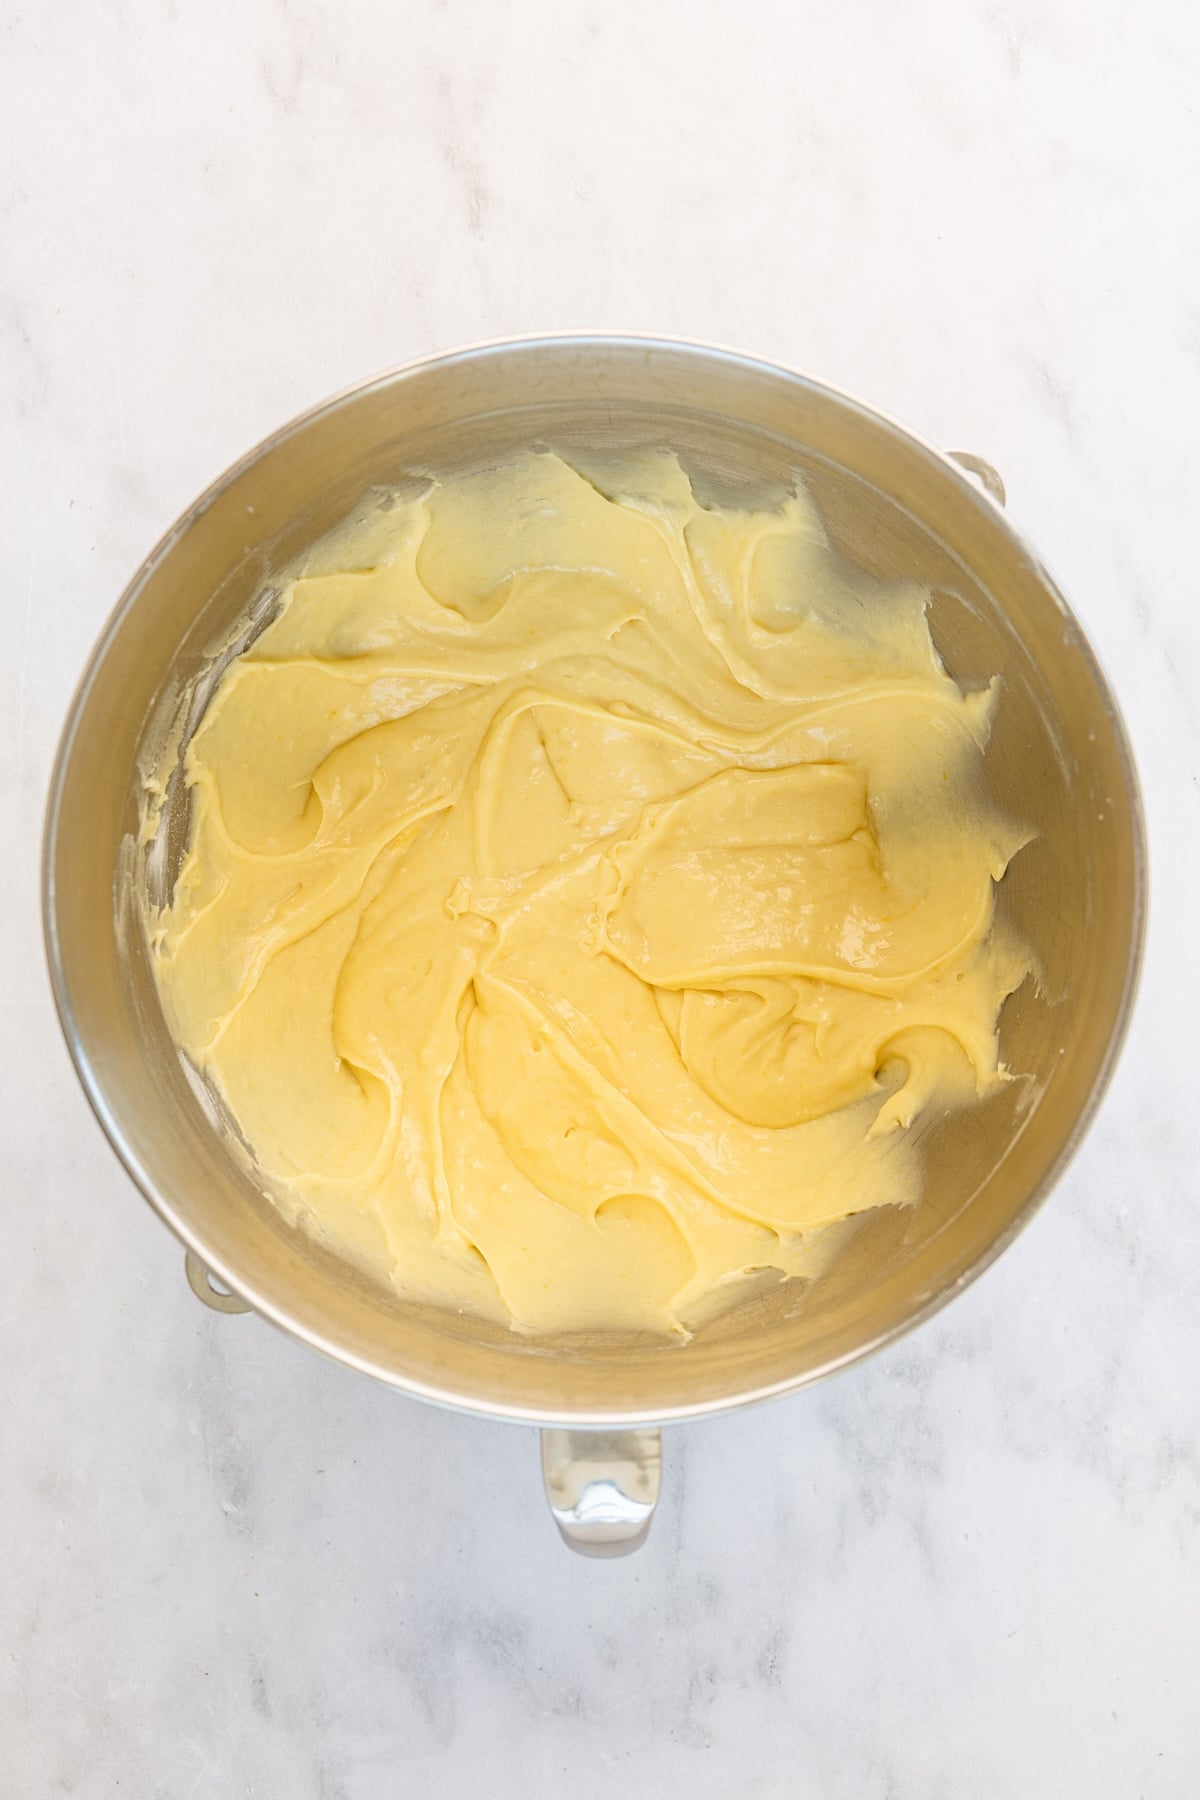
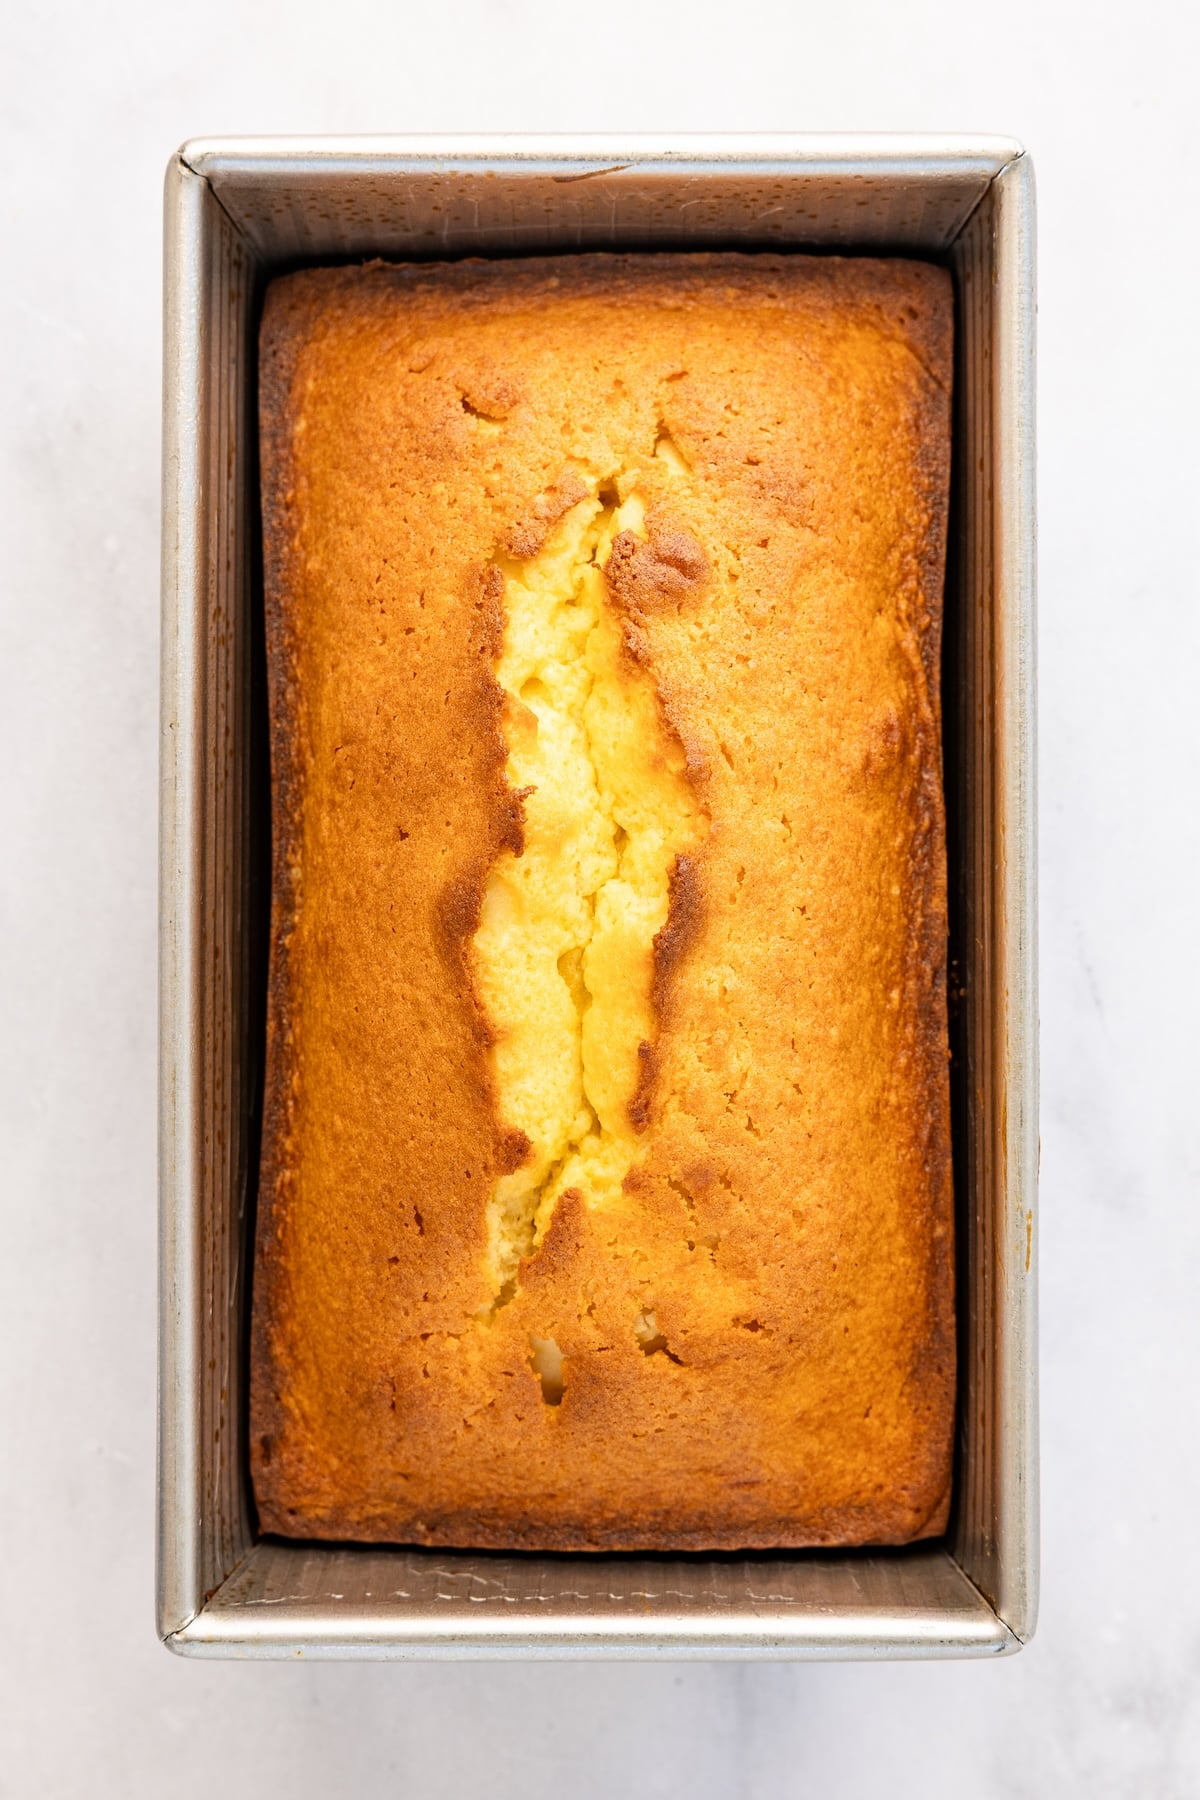
Step 4. Bake and cool. Scrape the batter into a 9 x 5-inch loaf pan prepared with nonstick spray and bake at 325°F for 65 to 75 minutes, or until the cake is golden and a tester inserted in the center comes out clean. Cool in the pan for 15 minutes, then invert onto a rack, right side up, to cool completely.
You May Also Like
Cream Cheese Pound Cake
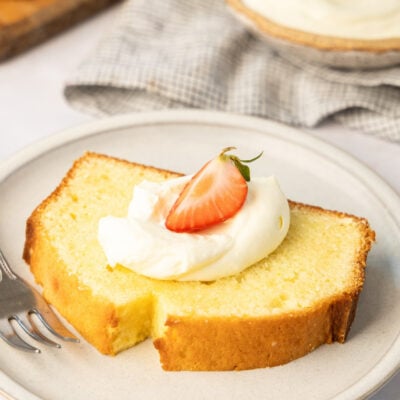
This rich, buttery cream cheese pound cake pairs beautifully with fresh fruit, whipped cream, or a cup of coffee.
Ingredients
US CustomaryMetric
Instructions
Preheat the oven to 325°F (165°C) and set an oven rack in the middle position. Spray a 9 x 5-inch (23 x 13-cm) loaf pan with nonstick spray (do not use spray with flour).
In a medium bowl, whisk together the flour, baking powder, and salt.
In the bowl of an electric mixer fitted with the paddle attachment (or use beaters), combine the butter, cream cheese, and sugar. Beat on medium speed until light, about 3 minutes. Mix in the vanilla, then add the eggs one at a time, beating until smooth—about 15 seconds per egg—and scraping down the bowl as needed.
Add the flour mixture and beat on low speed until just combined, scraping down the sides and bottom of the bowl as necessary. Use a rubber spatula to give the batter a final mix, then scrape it into the prepared pan and smooth the top.
Bake for 65 to 75 minutes, or until the cake is golden, well risen, and a tester inserted in the center comes out clean. Cool in the pan for 15 minutes, then invert onto a rack, right side up, to cool completely.
Notes
Make-Ahead/Freezer-Friendly Instructions: This pound cake is best made fresh on the day of serving, when the crumb is at its most tender and the flavor is rich and buttery. That said, it also keeps well: once completely cooled, wrap it tightly in plastic wrap and store at room temperature for up to 2 days. For longer storage, wrap the cooled cake in plastic wrap and then in foil, and freeze for up to 3 months. Thaw overnight at room temperature, still wrapped, before serving.
Nutrition Information
Per serving (10 servings)Calories: 349kcalCarbohydrates: 41gProtein: 5gFat: 19gSaturated Fat: 11gCholesterol: 119mgSodium: 217mgFiber: 1gSugar: 27g
This website is written and produced for informational purposes only. I am not a certified nutritionist and the nutritional data on this site has not been evaluated or approved by a nutritionist or the Food and Drug Administration. Nutritional information is offered as a courtesy and should not be construed as a guarantee. The data is calculated through an online nutritional calculator, Edamam.com. Although I do my best to provide accurate nutritional information, these figures should be considered estimates only. Varying factors such as product types or brands purchased, natural fluctuations in fresh produce, and the way ingredients are processed change the effective nutritional information in any given recipe. Furthermore, different online calculators provide different results depending on their own nutrition fact sources and algorithms. To obtain the most accurate nutritional information in a given recipe, you should calculate the nutritional information with the actual ingredients used in your recipe, using your preferred nutrition calculator.